Saturday 28 September 2013

Just Call Him Mr Beaky...

...or rather... Mr Beakless... poor little thing!  I made this birdy house as a sample for last weeks tellyshows and I had this little birdy pin that I decided I would use to adorn the birdyhouse.  Somewhere along the way he has lost his beak... only I didn't realise until I was looking closely at the pics... whoooops!  Anyways... here's how I made it!


The birdyhouse is fab!  Tis all in slot together pieces that I covered with Teresa Collins Creative Expressions papers and then sanded around the edges to smarted them up.  I used Jet Black Archival to stamp some swirls onto the sides and front and then set about adding some flowers.  Well, I have to add them to most things don't I?  These are made from the Funky Flowers Creative Exprssions stamp set, stamped in Orange Blossom Archival onto more of the papers and curled and shaped to make pretty blooms.  I added leaves behind them, they were stamped in Fern Green Archival (I am LOVING the new Wendy Vecchi Signature Designer Archival Inks... you NEED them too!)  The roof was so easy to do too.  I used one of the panels as a template for the scallops and pencil drew around them onto the papers... and cut strips, cut out the scallops, sanded them, layered them up and then glued the whole layered effort to the roof panel.  REALLY, that simples!  And very effective once I had curled up the "tiles" using a pencil to assist with the rolling.  I am off to hunt for the poor old beak... it must be languishing in the bottom of a box somewhere... well, if I can't find it I shall have to fashion another one... can't have the little fella beakless forever now!


Don't forget, there isn't a new Sunday Stamper tomorrow... but you still have another week to join in with the current theme which is KEYS.  All the deets for the Sunday Stamper are HERE... I am a little slow in visiting you all this week but I will be around soon, promise!  Thanks for looking and have a great day!  TTFN

Hels x

Wednesday 25 September 2013

My Life In A Dinghy...

...you would not know how hard it has been for me to keep my trap shut about this thing that I have been involved in!!!  I have been fit to burst both with excitement and honour too!  And why?  Well, the wonder woman Lisa Pace messaged me a few weeks ago and asked if I would like to take part in a feature she is running on her blog.  Basically, the remit is to make a dinghy... out of the insidey bit of a loo roll!  Instantly I was "yes! PLEASE!!"  And during the next few weeks Lisa is showing the dinghy's made by the jaw droppingly amazing artists who are involved in her feature. *tbh, I am SO glad I didn't know who else was taking part, I would have been so overwhelmed!*  To see Lisa's blog, CLICK HERE and my little dinghy will whizz you across the Pond to see her and them...


So.  Lisa emailed a template through and a few instructions.  And then said "it is your dinghy, make it how you want it to be"   Firstly, I did the whole template thing and my dinghy kept coming up too small.  Aha!  I sussed it out.  The loo rolls in the UK are smaller than the ones in the USA.  Ha! The ones we have are those new ones that have tiddly little middles... well, not to be beaten, I grabbed the inny bit of a kitchen roll and cut that down to size instead.


Then I set about the decorations.  Well, I say that... what I actually mean is I glued it all together and then realised... DOH!  How hard it was to be decorated it whilst it is assembled.  So, I went and grabbed another kitchen roll inny and set about making my dinghy... again ;o))  I gave it a coat of Mushroom paint inside and out and added on an extra bit so the back of the dinghy is a bit flatter than the front (ok, I shall show my knowledge of boating now... the stern is flatter than the bow!  *bet you never knew that I know boaty things right?*)   I then got some Melange Tissue Wrap and tore it up into bits and used Glue & Seal to stick it all down.  I wanted music score as I love music and life in my dinghy would not be right unless there is music.  Once this had dried, I popped a wash of Salty Ocean (well, it had to be didn't it?) Distress Paint onto the surface and once this was dried, I added smidges of Walnut Stain DI to age the vessel.


I decided that I needed a sail.  So I sat and thought, and thought, and thought... and then my eye happened to glance into the desk-tidy-of-doom which is full of junk... and I spied a kebab stick.  AHA!  Eureka and all that malarkey.  So, armed with Tim's scissors (not his actual ones cos I don't think he would appreciate me nicking his scissors lol) and some Cosmic Glue I cut the kebab stick to be a sail shape.  I glued the bits together and then painted them black (and yes, Cosmic Glue stuck it strong!)  I then needed something to anchor the mast to the dinghy so I stuck two little cotton reels together and painted those black too and then bunged the mast into the reels.... result!  So, the sail.  Now, you all know how rubbish I am with a needle and thread. But you all also know that I am a stubborn old bat and I wanted to do a proper sail, so I persevered... and after sussing out if I put a tulle cover on the mast I then had something to stitch the cotton sails to.  Hurrah! It worked!  I used Walnut Stain to age up my sail too... and then added little pompom trims to either side.  A few flowers and some netting to decorate and there you have it.  Actually, that is the bit I am most chuffed with!


Lisa asked us to describe what life is like in the dinghy.  My dinghy smells delicious as it is chock full of everlasting flowers!  There are resident butterflies to make the voyages in the dinghy peaceful and serene and there are piles of pearls so they catch the light and remind me of nature's beauty.  The pearls sit at the bottom of the dinghy and they provide footly massages which are rather gorgeous.  At the bow of the dinghy there lives a very magic tree.  A tree that is so sought after, there is only one living in the world... and there it is, on my dinghy.  Now this tree has a very special and powerful elixir that can only be extracted by squeezing the berries on the tree... and any old Tom, Dick or Hels can't just go and squeeze the the berries, oh no, it has to be done by a Unicorn - and it just so happens that one also lives in the dinghy with me.  The elixir from this tree has many properties, giving the receiver a health beyond all, free of pain.  One shellfull of Elixir and you feel like you will never lose your Mojo again, like the whole world is coloured by Distress Inks and also, although I have yet to encounter this, it also gives the imbiber the most vivid imagination known to man!  Do  you like my Unicorn? He is rather handsome isn't he? His name is Ubelazith, he is a rather shy old chap though and only reveals himself to those who really believe in Unicorns... so if you can't see him, don't be disappointed, you just need to concentrate a little harder ;o))    

And there you have it!  Something pretty from the inny from a loo roll!  Who'd have thought it eh?


Please do pop over to see Lisa's blog and check out the amazing creations from the other artists involved in this fabby feature!  Thanks for looking... TTFN!

Hels x

Tuesday 24 September 2013

The Key of Love...

...blimey! What a past few days indeedily!  Friday with the telly shows and then Sunday and yesterday teaching 30 wonderful ladies how to get thoroughly painty and messy Distress stylee over at Crafty Bunch in Telford... big thanks to Sue for being a brill host (and supplying copious amounts of THE best salmon sarnies in the world *said in my best Jeremy Clarkson voice*) and also thanks to all the ladies who came to play... and special mention to Margaret who most certainly is the funniest dame I ever did meet... I told her I am bringing her home with me next time :O)


Anyways... as promised here's one of the samples for the telly shows on Friday.  Made from the "ornaments set" this is the Love Tag.  Description being very self explanatory, it is thin wood/ply/veneer, laser cut for the tag (it is like it was made for me!) and then the laser cut letters too! Ha!  I used some of the delish Teresa Collins papers (Creative Expressions special pack) and popped this onto the tag, cutting around it, sanding it and then edging with Walnut Stain DI.  I was so in my comfort zone, I loves music score muchly.  I also covered the little heart with the paper and used Fired Brick DI to colour it... painting the letters black and then sanding them and Distressing them and gluing them to the tag with the best glue ever, Cosmic Glue... and then adding a little Fancy Key Charm and a ribbon embellie to finish.  A nice simple tag but I do loves it :O)


Please do pop by to see me tomorrow.  I am all of a dither with the excitement of it all... I let the cat out of the bag the other night on Facebook but for those of you who didn't see it... Lisa Pace, the divine goddess of all things detailed, is doing a special blog feature called My Life in a Dinghy.  Pop on over to her blog to see what it is all about... and... she only went and asked me to take part!  I am overwhelmed and honoured to be asked... and blimey, you should see who else is being featured... I am grinning like the proverbial loon to think I am part of this brilliant feature!  Anyways... my dinghy will be posting tomorrow afternoon at 2pm GMT.. can't wait to see what you thinks of it!   In the meantime, I shall bid you a very goodly day and say... Thanks for looking!  TTFN

Hels x

Sunday 22 September 2013

Sunday Stamper - Week 276 - Lock & Key

Gooodly Morning Stampers and a very happy Sunday to you all!  Thank you for the gorgeous entries for last weeks challenge.  This week is going to be a slightly different than normal challenge... because it is going to be a TWO week challenge.  Oh yesh, for the first time in 4 years, the Sunday Stamper will be taking a week off... fear not though, it will be back again on October 6th.  On with this fortnightly challenge theme though which is... KEYS.  To join in is simples: make a little something, it can be anything you fancy.  Add in the theme AND some stamping.  Once you have made your creation, pop back here to leave me a comment with a link to the place you are showing your entry.    If you haven't got a blog, you can also join in via Facebook, simply tag my name on your upload... or by email and attaching a small resolution piccie for me to see.  My email addy is over there *points left* where my photo is, click on that and you can get the deets :O)  Remember, this is a two week challenge and will remain open until 21:00 Saturday 5th October 2013.


My entry this week is one of my show samples... I have been so busy making samples and such like that I didn't get chance to do any other art for the past couple of weeks.... and I know that sometimes we don't get a chance to see the samples close up so I thought I would share a few with you this week, starting with this one.  It is made from the 3 board hanging set and it is MDF based.  I love love love this set... perfect size and of course, being MDF is always going to be a winner.


The base was painted with Lake Mist Dabber and then I layered up some That Special Touch stencils... Scattered Straw blended through the Trellis stencil... then Broken China through the Flower mask and then the Sunburst stencil... LOVE this one... that is Seedless Preserves DI blended through that.  The stamping is done with Watering Can Archival Ink (LOVE this colour, tis my new fave.. thank you Wendy Vecchi for making this one happen!)  I used the Creative Expressions Textures stamps.. the top and bottom panel have the crackle background randomly stamped and the middle has that gorgeous french text stamped.


The flowers are stamped onto Foundations papers using Aquamarine and Blue Violet Archivals and then cut out, curled, layered and decorated with pearl middles.  I love adding lots of goodies into a bundle of flowers which is where the fabby Embellish Your Art pieces came in handy... and of course... glass vials filled with the delicious new Broken China Distress Glitter...well, it had to be done!  I LOVE that new glitter!  Shhh, don't tell anyone though... being as I am a non-glittery kind of person normally lol


Right, I shall away... hope you all have a great day planned... I am away to Telford to teach at Crafty Bunch today and tomorrow.  Thanks for looking!  TTFN

Hels x

Saturday 21 September 2013

Dream Keeper

...COR!! Blimey!!! And!!! THRICE!!!   BIIIIG thanks to you all for your amazing support for yesterday tellybox shows!  I loved reading all your emails and thank you also for those who sent in photo's of your creations, I loves seeing the stuff you make!  Three whirlwind shows and lots of happy peeps who are now sitting on their doormats eagerly waiting to pounce on Postie... for those of you who managed to get your goodies, well done and... have fun playing!  I should also add that a couple of people who phoned their orders through and missed out on the Owl Clock were reliably told by customer services that I will be back on screen next week with more MDF goodies... erm... I won't be, so apologies for that... but I will hopefully be back soonly with more MDF loveliness :O))


Anyways... being as I like to be organised (who snorted?) I always get my demo's all prepped up and ready to go... and always make sure I have more than I needs.  Well, the demo's for yesterdays afternoon and evening shows were all prepped.  And then the Owl Clock sold out.  And then the birdhouses sold out.  So, I thought I would do a Shadow Box demo instead... and then that sold out too!  Yikes!  I spent a bit of extra time in the studio and prepped up this demo for the 4pm show but we ran out of time so I used it for the 7pm show instead.


If you managed to catch the shows then skip this next bit as I am repeating meself (haha)  I used a large plaque that Grim had very kindly drilled holes in (I just do not trust meself with a drill... I can do enough damage with a craft knife, let alone something that spins very fastly and would probably smart a bit if it came into contact with a hand)  Starting by covering the plaque with Lake Mist Dabber and then once dried, overlaying the Trellis mask and applying Scattered Straw DI though it.  Next up I popped the Grid mask on and used Forest Moss DI through it, making sure the ink only went on it patches.  Finally, I added the Blossom mask and popped Walnut Stain DI though it.  Now, you can see the DI goes almost pastel when it is applied to paint... I love this muted soft effect.   A bit of stamping using the crackle Texture stamp and Jet Black Archival Ink... and then the finishing flourish with ... erm.. a flourishy swirl from the Swirls stamp set.  Zap the stamping with a heat tool to set the ink and stop inky smudges.... always a good thing to remember to do that :O)  Decoration was provided by stamping Funky Flowers onto the gorgeous Teresa Collins papers (Oh how I LOVE these papers... and they were so cheap too!!!)  As you know, I have a bit of an addiction to all things Studio 490 and I added some of the fabby Embellish Your Art pieces.  Voila, done!  However, the stamped word I popped onto the piece fell off on the way home... so I used Alpha Parts instead as they happened to be on my desk... I do love an Alpha Part you know :O)


So, what you got planned for today?  I am getting ready for my classes at Crafty Bunch in Telford tomorrow and Monday and then I shall be seated in front of Lionel Laptop and Skyping with Ellen... not sure we will get any art made today though as she has a much more important appointment at lunch time... one which leaves me Peeled Paint in colour.  Oh yesh, she is going to Queen's Ink (I LOVE that place, shame it is 3700 miles away!) and she is seeing ... THE Wendy Vecchi.  Green? Moi?  hell yes!!!   Thanks for looking, have a great day!  TTFN

Hels x

Friday 20 September 2013

Twit... Twoo!

...tis showtime today!  I am going to be on Create & Craft at 11am, 4pm and 7pm on Stamping with Creative Expressions.  For all the channel deets, please see the left hand side bar :O)  Anyways... as I have been twittering on all week, today I have a gorgeous new brand to show you all... and here's one of the samples that I made:


Firstly, isn't he cute?!!!  And secondly... I loves those Foundation papers, they distress up really well just with a sanding block.  I made lots of ruffles for Mr Owl, alternating the papers (they are double sided!) and then popped them onto his body and wings.


I better get a wiggles on, I am scheduling this post and as I type it is nearly 10pm and my nails needs attention!  Serious attention... they are covered in black paint!  Thank heavens for the Craft Scrubbie and a bit of clear nail varnish lol   Thanks for looking... hope you can tune in to see the other gorgeous MDF pieces that are on the shows.  TTFN!

Hels x

Thursday 19 September 2013

Sneaky Peeky Time!

... ooh I am ever so excited!  I have been working on samples for my tellybox shows tomorrow and I know I have been teasing you with little snippets of what I might be up to.  Well, I figured that I would show you a few sneaky peekingtons... but first... info about the shows: I am still waiting on confirmation for the times but as it stands they are 10am, 4pm and 7pm on Create & Craft, Sky Channel 671, Freeview 36, FreeSat 813 ad Virgin 747 tomorrow, 20th September 13.  Anyways, enough of that... here are some piccies!


Can you tell what it is yet?


I am SO excited to have a special paper pack on the shows too... designed by the wonderful Teresa Collins especially for Creative Expressions, this paper pad is LUSH!  As well as those papers, I have some more gorgeousness in paper form, masks, paints and embellies... oh and of course, the "launch" of this fabby new substrate... curious?  All will be revealed tomorrow ;O))


Right, I shall away... more sampling to do!  As ever, thanks for looking... have a FAB day!  TTFN

Hels x

Tuesday 17 September 2013

Beauty & The Butterflies

...I keep on saying it... I do!  You know I am on the Darkroom Door Design Team for 2013?  Well, it is THE best DT... I got a selection of the latest release stamps and I have been having a right old ball playing with them!  Today's offering is an altered frame which I have used the new Beauty Quote stamp and a new Eclectic Butterfly stamp (he is ginormous and GORGEOUS!)  To see the new releases and all the other delish stamps click HERE for the Darkroom Door website and also, HERE is the blog where you can see more arty stuff from my talented teamies.


This old frame started life as a greeny coloured plastic moulded jobby.  And, as ever, I forgot to get a pic before I altered it!  Whoops!   I removed the glass  and then cut a piece of patterned paper (the new Finnabair papers from Prima) to fit inside the frame.  Layering stencils and Distress Inks over the paper to add a little specialness was a starting point.  I didn't want the background too fussy so this is an ideal way of bringing in a bit of design without overpowering stuff.  I added some Crackle background around the edges using Watering Can Archival Ink, stamping just using my hand to hold the stamp so I didn't overdo it and stamp too much into the centre of the paper.


I stamped the Quote onto more of the paper and edged it with Aged Mahogany and Gathered Twigs DI's and then popped it onto black card to make it pop more.   The Butterfly is the big guy in the centre... he was stamped onto cream card, along with more butterflies from the Wings collection and then I used Rusty Hinge, Wild Honey and Aged Mahogany to colour the butterflies.  As ever, I coloured the underside of the wings with Gathered Twigs DI, this just finishes the butterflies nicely and because you can see the underside of the wings, there are no "white" surprises when you look at it from a different aspect.   The frame was coloured with Ruby, Copper and Spanish Topaz Treasure Golds, layering the colours on and building up the finish.  I also added a little brass butterfly to the centre of the big guy for a bit of extra decoration.


Right, I shall away... I have a "to-do" list longer than my left leg to get ticked off today... no rest for the wicked right?   Thanks for looking... have a grand day!  TTFN

Hels x

Monday 16 September 2013

...And... The Winner IS!!!

...cor blinking blimey!  Big thanks for all the lovely comments on my giveaway bloggy birthday post!  79 comments in total and all of you are telling me that you loves my waffling!  Whey hey, I don't need an excuse to yak for England now lol   I used Random.org to pick a winner, feeding the numbers in and it came up with number 11.  This tallies with the comment left by....


TRACY HEATON!  Congrats to Tracy, please can you email me your postal addy and I will pop this tag into the mail for you.


No art to show you today... oh ho, I am midst sample making for the telly shows on Friday (brand new product... loves it!) and also I have my secret project that I am just putting the finishing touches to... and another good excuse is that yesterday I spent most of the day gawping at the telly watching the Touring Cars.  We were going to go as it is only 20mins down the road to the circuit but... Mr Weatherman said that it was going to be horrendously rainy and freezing cold and what with my back and Grim's knees we decided to watch it on the tellybox.  What actually happened was it spat with rain and wasn't that cold!  Tsk... never mind, to make up for the lack of seeing the racing live, I cooked a nice beef in ale and Yorkie Puds... so all was not lost!   NOM!

I shall away now... I have an appointment with some... new stuff!   Thanks for looking! TTFN

Hels x


Sunday 15 September 2013

Sunday Stamper - Week 275 - Hang On Sloopy

Goooodly Morning Stampers and a very happy Sunday to you all!  Many thanks for the wonderful birdy entries for last weeks challenge... and it is lovely to see a few newbies joining in too :O)   This week the challenge is a little different - normally I suggest you make anything you fancy - this week the challenge theme is to... MAKE A HANGING.   To join is simples - make a little hanging and include some stamping on it!   Once you have made your creation (and remember, it can be any size, shape, style etc you fancy) pop back here to leave me a comment along with a link to the place you are showing your entry.  If you don't have a blog/web-photo-hosty thing, you can also join in via Facebook (just tag my name on your photo upload) or by emailing me a photo of your creation (my email addy can be found by clicking on the piccie of me over there *points left*)  The challenge will remain open until 21:00 Saturday 21st September 2013.


I keep saying this... I do indeedily cos I means it... I am a lucky ducky!  Being part of the 2013 Darkroom Door Design Team is such a great honour and I have been so lucky to receive some more of the gorgeous new releases. Todays creation is featuring the new Pocket Watch stamp which I am in lurves with.  As with all Darkroom Door stamps, you know you are going to get quality rubber and quality images and this beauty of a stamp proves it!  The detailing in the design around the edge of the watch is intricate but stamps directly from an inkpad... sometimes really intricate stamps will need ink applying with a brayer, not so in this case (although you could if you were fussed!) However, sometimes I see an intricate design and groan... that usually means lots of fiddle faffing with the cutting out.  Not so! You see the top of the watch?  I cut that out meself (and I don't do faffy cutting) simply punching a hole in the card and then using the pointy snips of my scissors to go in and cut inside the "handle" of the watch.  Colouring the watch was done using a very small amount of Tarnished Brass Distress Stain, applied with a water brush to the edges of the watch and then stamping again, cutting out the middle and colouring with a smidge of Walnut Stain DI.  I then used a paperstump to puff the watchface, applying to the whole image with silicone glue. Simples!


The base of my hanging design is a 5" x 7" canvas board painted with black paint.  I then used the large A6 Gazette Background, stamped in Jet Black Archival ink as the base point for the decoration.  I used Antique Linen and Tumbled Glass DI to colour the card... spritz and flick with water and dry... then edged with Walnut Stain.  Then I decided that the Tumbled Glass was way too pale, so I went back in and added some more just for a pop of colour.  I used an edge distresser to rough up the edges of the card to add a smidge of shabby.  The butterflies are from the Wings set (I know, I know... I shouldn't have favourites but... ) and these were coloured with Tumbled Glass DI on the front and Walnut Stain under their wings. The words are from the Art De Fleur Wordstrip (another fave - love that font) and I just dappled Tumbled Glass onto the card to tone it in.  Finishing touches were some grosgrain ribbons and a little metal corner.


To see more designs using the new release stamps, please do head over to see the arty beauty that my teamies have been creating.  The Darkroom Door blog is HERE and to see stockists and the full range of stamps, the Darkroom Door store is HERE


I had a marvellous day yesterday... oh yesh, I was teaching at Birds in the Barn in Essex and whilst I had every intention of finishing my canvas, alas, I didn't!  However... I am a little bit boastyful because... remember the new motto "keep the Room of Stash tidy, remove all boxes, unpack, put away..."??  Well!  I got home, Grim helped me with the boxes and I, being the reformed character that I now am, unpacked them... and put away the stash!  I know!  I am, at present, multi-tasking.  Oh yesh, I am indeedily typing and polishing my halo at the same time ;o)  And on that bombshell, I shall bid you a goodly day and say... Thanks for looking!  TTFN

Hels x

PS... BTCC today at Rockingham... GO PLATO!!! *he is on Pole for race one after qualifying... finger's X'd and all that.....

Friday 13 September 2013

It's Giveaway Time!

...cor! blimey!  Where did this week go???  One minute it was Monday morning and the next... it is now!  Anyways... as promised last weekend, I am doing a giveaway today to celebrate my bloggy birthday which was actually September 7th but being as I do like a celebration, I have drawn the whole bloggy birthday thing out!   So.  The Giveaway!  Well, I have this tag here for one randomly picked commenter on this post.  That's all you needs to do... leave a comment on this post!  Simples huh?   The giveaway will close at 23:59 on Sunday 15th September and the winner will be announced on Monday 16th September '13.


So, seven who years ago I began this blog!  I started it because I had a Photobucket (do peeps still have those?) and when I tried to type out how I had made something there were never enough characters left to write everything down (and you know my propensity for yakking right?)  My first steps into this world we call Blogland we relatively tentative... until I realised that there are lots of peeps out there who also blog and want to share the art they make.   Sometimes I will click on the archive label and go back through the years and see how my creations have changed.  One thing that has not changed is the waffle that always seems to accompany any post I do... well, like I always say, I have a captive audience and waffling away just seems to come naturally to me. 


Seven years ago... such a lot has happened in the past seven years... some good and some bad... I guess we can all say that though - all part of this rich tapestry we call life.  During the darkest days, when I lost my career to ill health, I used to creep onto my blog and pretend that all was good in the world... and to be honest, it really helped.  It was cathartic to just sit and type and be silly... and put out photo's of stuff I had made... that was the most rewarding and positive thing because I received so many encouraging comments it gave me a sense of purpose and took my mind off the nasty things I was experiencing in my life.  I have also made some very dear friends through blogging... that was one thing I never expected and I am thankful to Blogger for opening up this world of ours and making distances just the blink of an eye.


Anyways... enough of all my wafflings for the moment... I have 101 things to do today and sitting here clacking isn't getting any of them done.  First on the list is the Battle of the Barnet... oh yesh, I needs to do me hair (a job I put off for as long as possible because it takes 251 hours to dry the stuff) and then I have a very special project that I am working on... all will be revealed next week... let's just say... I am very honoured and verrrrry excited about it!!!  I shall away... have a brilliant day and as ever, thanks for looking!  TTFN

Hels x


Sunday 8 September 2013

Sunday Stamper - Week 274 - And Your Bird Can Sing

Goooodly Morning Stampers and a very happy Sunday to you all!  Many thanks for all your gorgeous entries to last weeks challenge.  This week the theme really chose itself as all I seem to be doing at the moment is bunging our feathered friends on my creations... so the theme is... BIRDS.   To join in with the challenge is simples: make a little something, it can be anything you fancy.  Add in the theme AND some stamping and the pop back here to leave me a comment with a link to the place you are showing your entry.  If you haven't got a blog/web-photo-hosty thingy, you can also join in via Facebook - simply tag my name on your photo upload - or pop me an email over with a small sized pic.  The challenge will remain open until 21:00 Saturday 14th September 2013.


My creation this week is a tag... long time since I had a proper taggy play!  I started out using some of the new deeelish Laboratorie papers from the Duke of Distress.  I LOVE these papers... the black and whites are just perfection and whilst I ain't a skull kinda gal, I love the backsides of the papers (you know what I mean lol)  The script page I chose to cover my tag proved another fluke too!  Unbeknownst to me, whilst I chose this paper just 'cos I like the writing, when it came to look at my piccies close up I noticed the typeface that says "54 Eagle Street"  How blooming spooky is that!!! I had already picked birds as the theme too... tis an omen!


I used some Antique Linen Distress Paint and drippaged some down the tag and then misted it so it went all smooshy and then once dried, I edged the papers with Vintage Photo and added some stencilling using the Dot Fade and Stars Stencils, also from the Duke of Distress.... love the little dots in Black Soot... how cute!  I added a snippet of the diamond papers... I LOVE diamonds as you know and these distressy ones on the papers are perfect.


I added some birdy and flourish stamping using Jet Black Archival ink and where the paint has dripped down the tag, you can see the Archival Ink is going creamier... I also added a couple of squirts of Espresso Colorwash and then set about the decorations.   In the form of a few little Prima flowers, layered up, spritzed with Espresso Colorwash to tie them in with the tag design and then layered up with a few metal and twiggy bits.  The charms were a pressie my mate Dan got me from Michael's... they are just jzuhjzzed up a bit with some Treasure Gold.


So, whatcha got planned for today?   I am in Southampton this weekend teaching at Pickwell Farm... I know a lot of peeps who live down this way might not be aware of this little jewel of a craft shop... seriously... it is my idea of heaven! Not only is there a Farm Shop (as the name would suggest) but it has Yankee Candles (mmm, my faves) and plants... and... STASH!   Worth a visit if you are in the area :O)  Right, I shall away, todays victims, I mean students (ahem) will be arriving shortly!  Thanks for looking, have a fabby day whatever you are up to!  TTFN

Hels x


Saturday 7 September 2013

Six Years...

Cor blinking blimey and thrice! I realized this afternoon that today is my 6th Blogaversary! Oh yesh... six whole years of waffling!
Being as I am out and about this weekend I thought I would try and blog from my phone... let's hope it works! I will be back tomorrow with the Sunday Stamper and watch out next week for a bloggy birthday giveaway!
Hope you're having a fab weekend! TTFN

Hels x

Friday 6 September 2013

Super Speedy Five Minute Make!

..tisn't often that I do speedy makes but the cuteness of the new Carved Birds stamps Vol 2 from Darkroom Door allows the stamper to do just that... ink and stamp!  On Tuesday I showed up a rather involved creation using the gorgeous Carved Birds, designed by my DD DT teamie, Godelieve Tijskens and promised I would be back with a quick make card... and here I am!


This literally is a five minute make too.  Using a few different coloured ink pads and a couple of the birdies to make a border, simply ink up the birds and stamp them in a line.  I used the new Wendy Vecchi Signature Designer Archival Inks from Ranger, I do love stamping in Archival to achieve that crisper image but most inks will work well.  Once the birds were stamped, I used an Archival Pen and added black to the legs and beaks and eyes of the birds for a spot of contrast.  Next I stamped the largest bird in Red Geranium Archival, cut him out and then added Black Archival Pen to his beak and eye and then around his markings.   A Sharpie Marker comes is sooo handy for the next step... cut out the bird and then use the Sharpie to draw around the edge of the bird... this will make the red ink have a frame so he pops more from the card.  Use a ball tool or paper stump to "puff" his body, add 3d foam, pop him onto the card and then use the Archival Pen to add legs (I added knobbly knees to him too)  The sentiment is a fabby Word Strip sentiment... cut out, edged with more Sharpie and then 3D'd onto the card.  And done!  Sometimes the simplest design and the quickest card can be the most rewarding, I think I have captured the quirkiness of these cute little birdies and using the different colours just adds to the fun.


I shall away now... today I am busy doing final prep for my weekend classes at Pickwell Farm...  and I up to my eyes in cutting card!  Thanks for looking... have a brill day!  TTFN

Hels x

Thursday 5 September 2013

A Thing About Birds...

...is what I seem to have this week!  Firstly on Monday there was the lurve bird... and then Tuesday was the Love Birds... and now today... the Sweetie bird!  Yikes, I shall be watching out in case I start sprouting feathers and having an urge to poop on car bonnets!!  *oh dear, I said that out loud didn't I?*  Anyways... sillyness aside, today is my second project showing day for the Snazzy DT.  To see the piece in full and how I made it, please CLICK HERE where a large white birdy will whisk you off to the blog!  *yep, been taking the meds too*  Wanna sneaky peeky?  There ya go.... 


I am really chuffed with this piece because it started out as something totally different... it was sketched as a canvas and had a pocket at the base and had no flowers!  I know!  But I couldn't find the canvas I wanted (thinks I have already used it actually) and I came across a papier mache board so went with that instead.  I love these 9th Wave papers, designed by the wonderous Anna Dabrowska for 7Dots Studio... they are thick for starters, double sided (always a bonus right?) and the colours... ohhhlalaaa... right up my street.  Check out the ickle birdy... isn't he just cute!  I got three of these little guys when I was up in Durham a few weeks ago and stabbed myself stupid in the leg whilst carrying them home... not realising they are attached to a PIN... yep, what is that ouchy thing hurting? Oh yesh, that would be a pin... seriously, if I had a brain I would be dangerous!


Anyways... as much I would love to sit here and waffle, I can't!  I must away... I have much halo polishing to be getting on with... the "Keep the Room of Stash Tidy" campaign is still going strong and I have been ever so good... tidying away after each project, cleaning the desk, cleaning out brushes instead of leaving them for weeks in manky water... is this a new Hels you see before you?  Well, I guess so, til the halo slips and throttles me!  Thanks for looking, have a goodly day! TTFN

Hels x

Tuesday 3 September 2013

Two Little Birds Sitting in a Tree...

...ooooh, tis exciting!  I have just received my latest batch of brand new stamp designs from Darkroom Door and I am in lurves!  Todays post features one of a two volume set of quirky little birdies called Carved Birds Vol. 2 and they have been designed by my teamie Godelieve Tijskens... click HERE for her blog where you can see some fabby things she has made with her new rubber babies.  I regularly get asked about Darkroom Door stamps so HERE is a linky to the store and HERE is a linky to the blog so you can pop over to Australia and visit... oh how I wish it was that easy to pop over to Aus... I neeeed to visit there, it is on the old bucket list you know :O))


Anyways, on with my creation using the cute l'il Carved Birds.  I started out with a plain 5" x 7" canvas and applied some Distress Paints; Broken China, Bundled Sage and Antique Linen... applying them direct to the canvas using the dabber top and then blending the colours through with my favourite applicator... my finger!   Next up I lightly spritzed the paints with water so they moved gently together and then zapped the canvas with a heat tool.  I wanted to add some darker colour to the canvas so chose Peeled Paint and squidged some across the top of the canvas, stood it upright and spritzed water down onto the paint so it dripped down the canvas... another zap with a heat tool and it was nicely blended and dried.   I added some Studio 490 Black Embossing Paste through a stencil and heat set it - I love the way it bubbled a bit to give more texture.  I then decided the background was a bit boring so I added some lines in Antique Linen and Black Soot Distress Paint and then popped some circles over them.  Still looking a bit bland I decided to splatter the same colour paints onto the canvas for a more distressy look.


My birds were stamped using Jet Black Archival onto Grungeboard and then coloured with Distress Markers to add some colour.  I cut a branch using the Sizzix Alterations Branch Tree die, again using Grungeboard... and then coloured with Gathered Twigs and Walnut Stain.  The sentiment is made up of letters from the Darkroom Door Alphas 2 Wordstrips - the Wordstrips are brilliant for adding sentiments... loooove them lots!  Finally I added a two tone border around the edges of the canvas and then smudges of Treasure Gold onto the texture paste for a smidge of bling.  And there you have it!  I also made a card which I will show you next week :O)


I am really excited about the new release of stamps and I have some great ideas buzzing in my head for my next projects... they will be coming up in a couple of weeks time.  I shall away now, as ever, thanks for looking... have a fabby day!! TTFN

Hels x


Monday 2 September 2013

Love Bird...

... cor blinking blimey and thrice!!!  Not only did my Mojo come home, he decided to stay! Which is just as well because today starts my week of DT projects for Snazzy's.  Last month I was on the cusp of losing my Mojo and didn't manage to do a particularly good job of my DT thing... which I hate because I do need to be able to do me best... IYKWIM.  Anyways... Mojo is home, he is still locked in the Really Useful Box, I am taking noooo chances on him beggaring off again but... my cunning plan for keeping the Room of Stash tidy and therefore, in turn, Mr Mojo happy, seems to be working.  For, you see, I have turned over a new leaf... well, for the time being... I have given myself a good old talking to and now, unless it is a matter of life and death, I am not allowed to remove my personage from the Room of Stash until I have tidied up after a crafty sesh.  If I am half way through a project then it is ok to leave it be... but I am not allowed to go to bed with mess everywhere!  


Well, it appears to have worked because yesterday I got all inky and messy with the gorgeous DT kit we have had to play with this month.  The new 7Dots Studio 9th Wave Collection from Finnabair (these papers are deeelish) and a set of Hero Arts stamps and stencil to match.  Ohhhlallaaaa... I was all excited when I found an old photo frame lurking around the other day so I decided to alter this for my DT project.  CLICK HERE to see the thingywotsit in full with all the pics/deets etc.  As I said yesterday, thank you all for hanging on in there and keeping on visiting even though the "out to lunch" sign was hanging on the door... I do appreciate you all!  I shall away now, I am getting a little misty!  Thanks for looking, have a goodly day!  TTFN

Hels x

Sunday 1 September 2013

Sunday Stamper - Week 273 - That's What Friends Are For

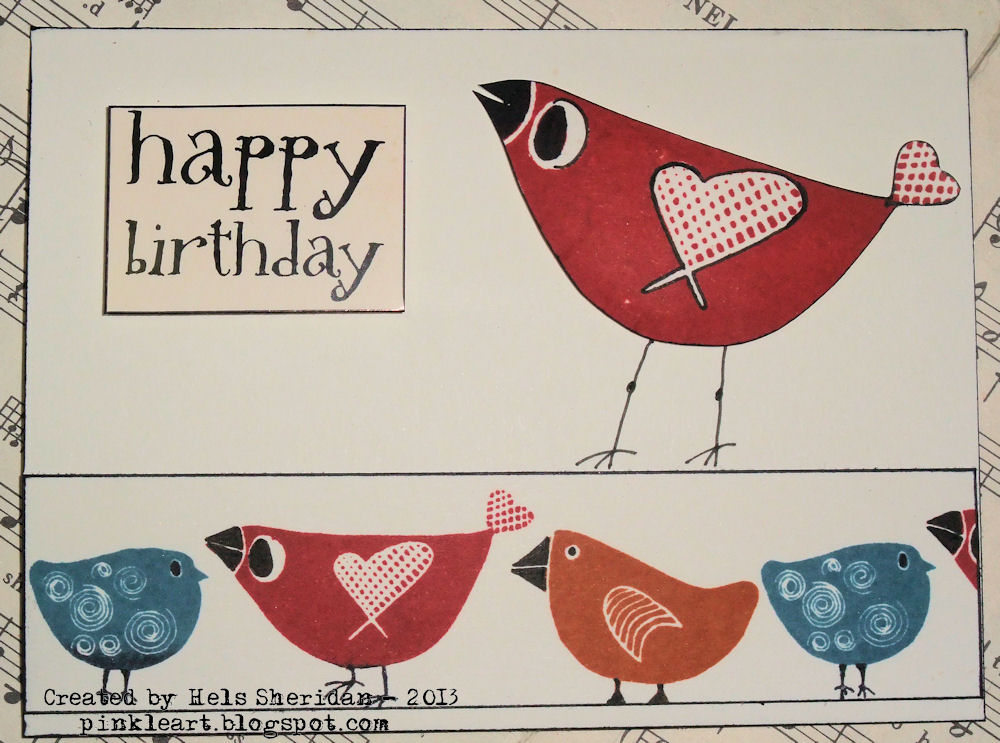
Goooodly Morning Stampers and a very happy Sunday to you all!  White Rabbits btw... tee hee... 1st of the month and all that!  Thanks for all the great entries for last weeks challenge too... I do love to visit and see your gorgeous creations.  This week is a very special theme which has been chosen by a very special person!  Oh yesh, this week the theme is FRIENDS and it has been chosen by my BFF Ellen.  More of that in a mo... but first... to join in with the Sunday Stamper is simples: Just make a little something - it can be anything you fancy.  Add in the theme and some stamping and then pop back here with a link to the place you are showing your entry.  If you don't have a blog/web-photo-hosty thingy, worry not... you can also join in via email - my addy is where my pic is over there *points left* just click the pic... or via Facebook - simply tag my name on your photo and I can pop by to see it.   The theme will remain open until 21:00 Saturday 7th September 2013.


Now, as you may have gathered, just recently I have been suffering with my pain and the old cad Mojo has decided it was high time to go off on his jollies.  Well, I had had enough of walking into the Pit of Doom - the new name for the Room of Stash - and walking back out again in disgust.  So yesterday morning I set myself a challenge to clear some shelf space and get rid of stuff I don't use.  So I did!  Oh yesh, I got rid of tonnes of stuff... only into boxes into the garage but it is a start right?   Next up was a lovely long Skype sesh with Ellen... only 5 hours this time... ahem... but it sure got my Mojo dancing as we had a little I Challenge Thee!  Hence, the title for this weeks' challenge... Friends... cos Ellen helped get my Mojo dancing again!   Here's the recipe for our Art Part Fest:

Using Wendy Vecchi's Art Parts:
3 x 5 1/2" x 7" Large book covers
Large Queen
Wings
Small square Frames
Scroll Leaf
Small Hand
Scallop Borders
Pencil
Crayon
Gears
Plus: Wendy's new Ranger Archival Inks (LUSH!)
Other Art Parts as desired.


What a list huh?  I was a bit afraid because it was BIIIIG!  And I haven't done a biiiig Art Part piece before... but hey ho, Mojo was creeping back slowly... almost like he was playing "What time is it Mr Wolf?"  Everytime I glanced over, thinking I could see him, he slid behind a rubber stamp or scootled under a craft sheet.  Then a lovely warm fuzzy feeling overtook me and voila!  He was HOME!  After grabbing him by the scruff of the neck and bunging him in a Really Useful Box,  I got into my Art Part Fest with great gusto!


I kept the background of the Covers very simple... covering them with the backsides of the Tim French Industrial papers (who snikkered then huh?) and sanding the edges and then blending some Gathered Twigs DI around to make them look a bit distressy.  The frames were covered with Gathered Twigs Stains, dried, sanded and then overstamped with Potting Soil Archival (my NEW FAVE!!!!  LOOOOOVE THIS ONE!!!! THANK YOU WENDY!!!!)  The leaves were coloured with Forest Moss and overstamped with Fern Green Archival, the wing was coloured with Scattered Straw Stain and overstamped with Orange Blossom Archival, the little flower was coloured with Barn Door Distress Marker and overstamped with Red Geranium Archival, the little scallops were coloured with Black Soot Stain and overstamped with Watering Can Archival... so the only one I didn' use was the Cornflower Blue... not bad going though eh?  I love all the new Archivals muchly... they are just my colours and hues... lushness indeeeedily.... you needs them!   You might now be able to see the crayon Art Parts immediately... that is because four of them are actually the "holder togetherers" of the three covers... and then a fifth was cut up to make stabilisers for the layers of Art Parts on the front bits.  Cunning huh!!!   Finally, the addition of some metal bits and bobs and some Embellish Your Art resin goodies were my little decorations... I know they were not on the list but.... if you don't tell, I won't ;O))  To see Ellen's amazebobs piece, CLICK HERE.  Ellen has created an amazing piece of art... and the complete polar opposite to mine... very unique and very Ellen.  


I must away!  I have fair worn myself out with all this creativity... but seriously, it has been tooooo long since I actually made anything.  I have never had a barren stretch like this before.  I don't think the pain has helped but I know for sure that the old Mojo is well and truly home (I can hear him hammering against the lid of the Really Useful Box as I type!)  Today I plan to get inky again and see if I can actually manage to blog during the week for a change!  I still can't believe that I haven't blogged from one Sunday to another... this is a first for me... 6 years of blogging and I haven't ever been so quiet!  I shall remedy that PDQ!   Anyways, thanks for sticking with me... I truly appreciate your support you know!   Thanks for looking, as ever, have a fabby day!  TTFN

Hels x

Related Posts with Thumbnails