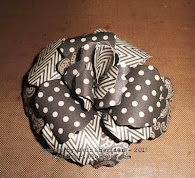
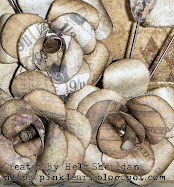
...As promised yesterday, here's a tutorial on how to make a big blousy rose using the Tattered Florals Alterations die. This is my favest rose to make, you have probably guessed that tho, it does appear frequently on my artwork! This tutorial is photo heavy - I have taken pics of every little step to make it easier to follow... so you might want to grab a cuppa and a biccie before you start reading! Anyways... enough of the waffling, here goes:
INGREDIENTS:
You will need three flowers cut from the Tattered Florals die. You can use d/s papers, card, Grungepaper for these... the best paper I have found is double sided as it is a bit tougher. You don't need to have three different patterns, I have used three different ones for the tut as it is easier to follow and I do like the effect. If you have fave papers and they are single sided, simply stick the paper to cardstock using Glue & Seal or Multi Medium, then you have your patterned papers, just a bit stronger! As well, as the three flowers, you will need strong wet glue. I always use Cosmic Shimmer Dries Clear - it also dries matte.. perfect! You will need sharp scissors and a pokey tool, plus five clips/grips.
**TOP TIP** Look at your three flowers as Flower 1, Flower 2 and Flower 3
STEP 1
This is Flower 1: Cut in between two petals up to the centre of the flower. We will be putting one petal over the top of the next one to make it into 5 petals.
Depending on which hand you write with, this will depend on which way you move the petals: I am right handed so the petal to the left of the snip always goes over the top of the right petal.
STEP 2
Chop the top off the petal that will go underneath and pop to one side. The reason why we do this is because if you leave the whole petal underneath, that one will have a double thickness of paper and a layer of glue, making it harder to curl the petals...
Use the tab left behind as a gluing platform... so you pop your glue onto the tab and then bring the petal to the left of the snip over the top.
STEP 3
Use one of your clips to hold the petals in place whilst the glue sets - Cosmic dries super fast but I do this just to make sure, also it frees up my paws to move onto the next step...
STEP 4
Now we are working on "Flower 2". This makes the layer with 4 petals and the centre petal. Cut out one petal
(as shown) and pop the cut out petal to one side - you will need this later.
STEP 5
Using your sharp scissors, cut out a small circle from the centre of the flower - this makes the assemblage part so much easier. Chop off the top of the petal to the left of the snip and save this off cut. You can discard the bit from the middle.
Pop some glue onto the tab, as shown.
STEP 6
Use another clip to hold the petals in place - you should now have the layer with 4 petals.
STEP 7
We are now using "Flower 3" and this will make the layers that have 3 and 2 petals. Over time I have made hundreds of these roses and have found that because the Tattered Florals hasn't got a uniform look, some of the "V's" between the petals are cut closer to the centre than others. So. You need to make sure that the cuts you make are around the "V" that is furthest away from the centre = as shown with the arrow
(do you like the arrow? I maded that meself lol) For this flower, you need to cut out two petals together...
STEP 8
This photo shows that you have cut out two petals together. Also, the top of the petal that is going underneath has been chopped off... and also, a half moon shape from the centre of the flower has been cut out - again, this is a vital step, it makes assemblage so much easier.
Keep the top of the petal you have chopped off - you can discard the middle snippy outy bit though.
Here you can see where the glue goes - as with other layers, it needs to be on the little tab.
STEP 9
Bring the petals together and use a clip to hold everything in place whilst the glue sets -
**TOP TIP** Make sure you have all three petals the same height when clipping - I have found if one of the petals is too low, this layer doesn't sit right in the flower when assembled.
STEP 10
Remember the two petals you just cut out? Now we are going to be working on these. Firstly, cut off the bottom point - you don't need this bit and if you leave it, it makes it more difficult to curl the petals around... it is...
pointless (insert groan of choice!)
STEP 11
Use your pokey tool to curl back the petals - this is because we need to stretch the fibres in the paper as once this little layer is assembled, it is harder to curl the petals back - if you have already stretched the paper, they curl back much easier.
Next, flatten out the curled petals, use your pokey tool to curl the petals inwards now
(as shown)
Pop a dab of glue onto the inside of one of the petals... as shown... and curl them around on each other...
STEP 12
The shape of this one should be similar to the trumpet of a daffodil, so the glued bit is just along the back where the petals have overlapped = pop a clip onto it and allow it to set.
STEP 13
Now we are working on the single petal, this will make the curled petal that goes into the middle of the rose. Firstly, snip off the bottom of the petal - again, this is ... pointless
(ahem)
Hold one side of the petal between your thumb and finger and curl the other side using your pokey tool.
Twist the curled side right around your pokey tool and then the flap at the top that is left, curl backwards on itself, as shown.
Pop a dab of glue onto the bottom of the petal, as shown.
Now pop a clip onto this bit to allow it to set.
You are now ready to begin assembling your rose. Start with the layer that has 5 petals:
STEP 14
Place your finger underneath the pointy bit on the 5 petal layer. Push this up gently so you have a little peak inside the flower
(as shown) this will make a good nest for the other layers and also gives the flower a flat bottom.
Curl the petals back using your pokey tool and use the peak as a glue guide - fill a nice moat of glue around the peak.
STEP 15
Remember when we cut out the circle from the middle of the flower that makes layer 4? This is because now, you can go in with the tips of your scissors and make that hole a little bigger - this makes it perfectly sized to fit over the peak inside layer 5. Curl the petals back using your pokey tool.
Pop layer 4 into layer 5 - you will need to jiggle this layer around until it sits neatly. Use your pokey tool to push the bottom of this layer into the glue if you need to.
STEP 16
Now we are working with layer 3. Again, use your scissors to snip a larger hole at the bottom of this layer. Curl the petals using your pokey tool to help the curls.
Add a good glob of glue around the bottom of this layer.
Pop the layer into the flower - again you will need to jiggle it about a smidge to get it to sit properly... tis all about the jiggling! Remember when I said that you need to make sure all the petals are the same height? That is really important because at this layer, if they aren't the same height,
they will look ugly!
STEP 17
Now are on layer 2 - Snip the bottom off the petals - remember I said about making sure you get the "V" that is furthest away from the middle? This is when it comes into play - if they "V" is too close to the bottom of the petals, you will either have a bit that is too tall.. or if you do cut it down to size, it can pop open...
Remember when we curled the petals to stretch the paper fibres? This is why... if you have them curled and glued and haven't stretched the fibres, you will have a bit of a rumpled paper... tis all in the prep!
Use layer 2 as a guide to the sizing of the centre bit. Pop layer 1 into layer 2 and cut it to fit.
STEP 18
Glue around the base of layer 1 and pop it into layer 2. Now glue around the bottom of layer 2 and place it into the rose. I do these two together so I don't jostle the already assembled layers.
Ta dah! you now have your assembled rose... but...
STEP 19
Remember the little snippy bits that we chopped off the top of the petals? Well, these are now used up to make little fillers. Your assembled rose is pretty but... there will be a few gaps, this is the nature of this shape of flower. No probs, use the off cuts to fit into the gaps!
Snip the paper so it is wider at the top that the bottom.
Pinch the base so it is curved and curl the top back using your pokey tool.
Add a dab of glue to the bottom...
Slot it into a gap. Continue with the other two pieces you have snipped...
And there you have it.
Yes, there are a lot of steps but I have done these so you can see everything you needs to do to get the rose to look so pretty.
I hope you have enjoyed the tut and please do let me know when you have had a play and if you enjoyed it! I shall away now... all this typing has me thirsty! Thanks for looking... TTFN
Hels x