Wednesday 31 October 2012

C'est Authentic!

...it is a little known fact that I was so atrocious at French when I was at school I was called a dunderhead on many, many occasions and failed my *ahem* O'Level *shows age* with a certain, erm...  je ne c'est quoi.  However, for some ridikkydudalus reason I do slip into a french accent every so often... and whenever I see the word "authentic" I insist on pronouncing it "authentique"  I know, bonkers, pure and simples.     Anyways... here's another page for my loose leaf journal... totes inspired by the wonder woman that is Wendy Vecchi.  Long time readers of my blog will probs recall a time when I ventured into journaling with the greatest of gusto's - buying several moleskine books in all different sizes, even making my own self bound (ok, I used a Bind it All) journal of all different sized pages and card/paper mediums.  And readers of this blog may well recall that I was a total failure at said journaling because I kept getting overwhelmed by ALL those pages... sooooo many to fill... like the amount of pressure I would be putting on myself to get the whole book finished.


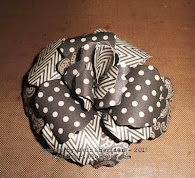
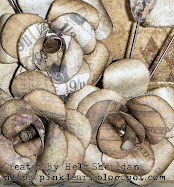
Then along came Wendy.  And she showed me that actually, you don't have to do a whole book in one go... oh no, you can do loose leaf pages and then bung them together in an Art Part binder.  Which is when that ickle lightbulb that hovers above my head went "bing".  So, I decided to be a right old copy-cat and do my own individual pages.   This here one was made using Ranger's Specialty Paper.  My word, this is gooooood stuff!  I was asked a few weeks ago to describe it.  Well, imagine how smooth glossy card is?  Well, this stuff is like matte glossy card... if that makes sense!  I used some Cosmic Misting Inks to get a nice smooshy background, spritzing the card with water and then the Inks (can't remember the colour... sorry) and then moving the card about before drying to get the splodgy look.  Then I overlaid the solid part of the Large Heart Stencils for Art and blended Fired Brick Distress Ink around it.  With the solid heart still in place I overlaid the Brick Wall stencil and used Aged Mahogany DI to blend some bricks... taking care not to right up to the edge so no harsh lines.  Next I  spritzed and flicked water to add some paler patches.  I overlaid the Large Heart Stencil (the out-y bit) and popped the Stripes from the Dots & Stripes Stencil over and used Fired Brick DI to add the lines.  This meant that with the open heart in place, it didn't take the lines over the edges of the heart.  I then used Classic Words and more Aged Mahogany DI - using a very fine liner pen to highlight parts of the letters.   Once I removed all the Stencils, I movd the Classic Words down to the bottom and added some numbers in the same way.  I doodled a couple of lines and scribbles around the edge of the heart and the page and then added a twist of rusty wire and a bow to finish.  And there you have it... my Authentique Coeur*I do remember some words from my schooling lol*


I had a lovely afternoon yesterday, seeing Aged P after a few months and of course, he brought fish & chips with him (and mushy pea's, can't forget those deeeevine mushy pea's)  We had a veritable feast and I ate every single last scrap on my plate... the fact that my trousers probably won't do up today is another matter... just as well I don't still live up North, I would be eating them everyday (the fish n chips, not the trousers lol)  Anyways, I shall away, I have some beauty sleep to catch up on and then today we are hopefully going to be planting up spring bulbs if the weather stays dry.   Thanks for looking... have a grand day... TTFN

Hels x

Tuesday 30 October 2012

Tag Time...

...cor blimey and thrice!  It is nearly November!  And... it is Tuesday! (bet you are glad I told you that... hahhaaa) and it means it is my day for The Stamp Attic DT.  This week I have mostly been playing with Metallic Distress Stains and have done a little show and tell HERE along with what I think of them... and a couple of ways to use them.  Next week I shall be doing another show and tell and will be using them in more different ways too.  To see more pics of my finished tag, please do go and check out the post.  Here's a sneaky peek anyways.


You will see I have made Pine Cones... and... I have found a doddle way of putting them together.  I have tried the cocktail stick and hot glue method, whilst it works, it is a wee bit dangerous for me being as anything molten hot is bound to end up dripping onto exposed skin.  So, when I was making them I had little think.... "wonder if Cosmic Glue will do it???"  Well, it works perfectly for the Spellbinders Spiral Blossoms... so I tried it... and yep! It works!  And... it is forgiving too, it glues the bottom of the Pine Cone pretty quickly, I only had to hold it for about a minute, then I started to bend the petals ( Know they aren't petals... can't think of the proper word...) and then because the base has stuck, you can then get some tweezers and pull the middle upwards so it turns from a flower into a pine cone!  Cool huh?  Anyways... I shall away... I have a very special birthday boy visitor arriving today and I am sooo looking forward to seeing him!  My Aged P (Dad - my affectionate nickname for him) is coming to stay for a couple of days... and... ssshh... he is bringing... Proper. Northern. Fish. And. Chips!  Yes, by the time he gets here they will be clap cold but... pop them onto a rack and into the oven for about 20 mins and they are back to gorgeousness.... and there will be mushy pea's too!  I can't even begin to describe how happy my little chops will be whilst I am scoffing said Fish & Chips, maybe I will get Grim to take a photo lol   Right, time to sign off... thanks for looking........ have a great day and... to all my American friends... PLEASE STAY SAFE!!!!  TTFN

Hels x

Monday 29 October 2012

Winter Woodland...

...have you seen those new Idea-ology Woodland Trees? I loves them!  They start life as a creamy white colour and you just add your own colours to them.  For these I drizzled a combo of Lettuce and Pesto Alcohol Inks all over them... turned them upside down to get rid of the excess and then gave it is gentle blast of heat from a heat tool... that burns off the excess alcohol fumes.  As soon as I saw the trees I knew I would be faffing with a Studio 490 Art Part Spool... perfect size and height to show off these cool litte decorations.


please excuse rubbish blurry pics... my camera did not want to focus!!!

Anyways... I decided the trees needed some frostyness... so I got some Ranger Glue & Seal and brushed it over the bristles (be careful with this, I have a lovely Glue & Seal splattered top now lol) and then rolled the tree in Dry Rock Candy Stickles (love this, looks like sugar)  And then I did the same again for the ickle tree.  I wanted to use the wreath that comes with the two trees but it didn't fit with the design so that is waiting for another project.


The Spool was covered with music score paper from the MME Lost & Found Xmas paper pad and then blended with Gathered Twigs DI around the edges... sanded to neated up and then assembled.  I made three Tattered Pinecones (Cosmic Glue is the best glue for this!) and added in a mini Red Cardinal (how sweet is he!) and some Branches and Holly Leaf cut from Grungeboard.   The little reindeer is a Movers & Shapers mini die... with a golden bell around his neck. (all Sizzix Alterations dies)  The ickle snowman is actually a tree decoration; my BFF Andrea sadly lost her father-in-law last year and when she was in the process of clearing out the house, she happened across some really old Xmas decs.  When she showed this little fella to me I knew I would be using him for something arty... I also have a little tree and a little angel from the same set which I will be using sometime soon too.


I have been keeping an eye on the weather over in America... and to all my American friends, stay safe, stay dry and stay warm... and praying the hurricane passes by and doesn't cause too much damage.  It is times like this that I feel the distance between us all.  The internet is a wonderful thing... makes the whole wide world so much smaller and accessible... but it also makes me realise how far away I am from my friends at times like this.  


That's all from me for today... I have about 462 things on my to-do list today... having had three days sick last week has made me so behind with all my projects... an inky day is called for me-thinks!  Oh and thank you all for the amazing comments on yesterdays post... wowow!!! Over 100 comments.... good luck all in the prize draw!  Thanks for looking... TTFN!


Hels x

Sunday 28 October 2012

Sunday Stamper - Week 229 - Harvest Moon **WITH SPECIAL SPONSOR!!!**

Goooooodly Morning Stampers and a very happy Autumnal Sunday to you all.  Thank you for all your gorgeous honey toned entries for last weeks challenge.  Can you hear that fizzing?  Yes?  Tis I!    I am OVER THE TOP excited today to be able to share with you a very special sponsor for my little Sunday Stamper challenge.  Before I gabble on about that, I will do the theme thingy... which is... AUTUMN/FALL.  I have chosen this song because a) I love Neil Young (he is one of my fave singers) and b) the American connection is VERY relevant.  Read on to find out why.....     So.  A couple of weeks ago, lovely Sarah from Simon Says Stamp sent me an email.  She said "hey Hels, could we feature you on our blog?"  I was like "!!!***!!!***!!! Lemme think about that... for a second... YES PLEASE!"   How excited am I that Simon Says Stamp have asked to feature me!!! Excited? I bounced all around the Room of Stash for several minutes (until I had to sit down because I had a fit of the vapours!)  Anyways.  The theme for the feature is Autumn/Fall.  And the date for the feature is today.  Which coincides with todays Sunday Stamper.  And... there's more excitement too!!!  Get this... Simon Says Stamp have very generously offered a $25 Gift Certificate as a prize too.  Here is how to be in with a chance to win:  read carefully though, tis for one day only!
LEAVE A COMMENT ON THIS POST BEFORE 23:59 TODAY (28TH OCTOBER 2012) AND A WINNER WILL BE CHOSEN AT RANDOM AND ANNOUNCED ON THE SIMON SAYS STAMP BLOG TOMORROW (29TH OCTOBER 2012)


 On with this weeks challenge now: the theme is AUTUMN/FALL be it colours, leaves, berries, hedgehogs (they love Autumn don't they?) spiders, even Hallowe'en... whatever floats your inky boat.  You can make anything you fancy, just add in the theme and some stamping and then pop back here with a linky to the place you are showing your entry and I can then hop on over to visit you.  If you don't have a blog, don't worry, you can join in by email/Photo-hosting-thingy/Facebook... and the challenge will remain open until 21:00 Saturday November 3rd 2012.   Now because the Simon Says gift is open for one day only, I thought I would also offer a little prezzie to one randomly picked entrant to the challenge this week.  You need to leave a comment for me AND join in with the challenge before the closing time and date.  The winner will be announced on next Sunday's post. 


You may have noticed that this post hasn't got many photo's... well, that is because all the pics etc are over on Simon Says Stamp blog for you to pop over and read... all the deets are HERE

All that is left for me to say is... a mahoooosive thank you to the lovely folks at Simon Says Stamp - I love their shop, if you haven't visited before, HERE's a link... seriously, the gorgeousness that they keep in stock... oohlalalaaaa, I could spend a large fortune there!  Thanks for looking... have a fab day!! TTFN

Hels x

Saturday 27 October 2012

Workshop Time...

...ahhh, I do love my job you know.  Today I shall be travelling to Wantage to The Stamp Attic to teach my Christmas Box class.  I have been having tonnes of fun with my Christmas stash... I think it is my most favourite theme of the year... yep, I loves Autumn with the colours and the leaves and Hallowe'en... but my heart is with the vintage side of Christmas crafting.  I totally "get" that some peeps want to do pink and purple for Christmas, me? I loves those deep reds and greens.  Anyways, here are a couple of pics of my class sample... I shall take lots of pics (camera is packed and ready *and this time I won't lose it lol*) because one of the most rewarding things about teaching a class is that this sample started life in my head and grew in the Room of Stash... and after a day teaching, even though the students have exactly the same stash to use, they are all so different... makes me smile biggly that does!


I ventured into town yesterday morning to go and see Mr Morrison's about getting some food for the cupboards and oh my word... it was bedlam in there!  I had to drive around for several yonks to find a parking space for Ferdy.  Anyways, my day was made when a lovely little old lady came up to me in the biscuit aisle (I was there for research purposes only of course *snort*) and asked... "please could you reach me down those biscuits?"   I looked up and there they were, top shelf... and bless her, she was smaller than me... so I reached up and got them for her.  Nothing marvellous about that right?  Wrong! Because... being a bit...erm... vertically challenged I am usually the one asking people to get stuff from top shelves (Noooooooo, not that kind of top shelf!!!!) and I once caused an argument between a chap and his lady when I nicely asked him if he could reach that last packet of Volly cases at the very back of the freezer... she stared daggers at me and when he walked back over to her she smacked him and said he had been flirting!  Akkkk, I am very careful whom I ask for help nowadays!  


Anyways, I guess I should stop with the waffle and start with the snoozles because my bed is a-calling me.  Oooh, and before I go... do check back for the Sunday Stamper tomorrow... ohlalala, have I got a TREAT for you!!!  Oh yesh... I am busting with excitement... like seriously busting... and can't tell you even a smidgey little tidbit, I can't tell you that the Sunday Stamper has a very special sponsor... oh no, I shall keep that one under my hat... teehee.  The post tomorrow will be published at 5am so please don't panic if you haven't seen it at midnight... there is a reason.... teeeeehheeeee..... Thanks for looking, have a FAB day!  TTFN

Hels x


Friday 26 October 2012

Fragile...

...me? Fragile?  Nah... I am made of strong stuff apparently.  Thank you again for all your lovely messages and emails and comments... I am feeling a heap better than I did this time yesterday and I am thinking I am over the worst... phew!  Whatever that buggetty-bug was, I sure am glad it...erm... bugg-ed off!  Anyways... being as the sum total of arty things made this week is a big fat zero, I thought I would share another of my show samples with you.  This time I have used paint to colour the Art Parts... and it just goes to show how versatile they are!  Because they are, in effect, a paper product, they take inks, paints, sprays etc really well.  My chosen paints are Sand, Black and Bronze Eco-Paints... which I lurves because they are so creamy.  Ohhh and whilst I think on... Simon Says Stamp & Show have Inspired by Wendy Vecchi as their theme this week... so I shall be entering this into that challenge.  Do go and check out the blog, there's a F A B couple of tut's on there by Wendy herself... and a discount in the store too! CLICK HERE for all the deets.


I used Cut & Dry Foam to apply the paint... I have developed a cunning way of applying the paints so they blend nicely - otherwise I always seem to get a line between the two colours.  Use one piece of Cut & Dry (be generous, a scimpy square ain't gonna work) about 2" square *you will wash it out after use so it is reusable!* Blend the palest colour right over the piece (be it canvas, card, Art Part etc) and use a "pouncing" action, lightly tapping the paint onto the surface.  While this is still wet, pick up your darker colour on one half only of the foam.  Have the darker colour furthest from you (so it is outer on the foam) and pounce this onto the edges of your surface. This means when you pounce it onto the surface, the darker colour hits the edgey bits and where the lighter colour is still wet on the foam and surface, it will blend nicely.  Hope that helps :O))  Check out the buttons! They are the blue ones from the Embellish Your Art Antique Buttons pack... I painted them with the same Cut & Dry Foam and Bronze paint and then once dried, I rubbed a smidge of Archival Jet Black over the raised bits with my finger.  Cool huh?


Anyways... being as I have been on my death bed all week (1,2,3 awwww) I figured I deserved a little treat.  I have to say, Grim has been an amazing hubby this week *well, he is every week but you know what I mean*... he is good with cuddles and magic hugs and sympathy... and made me a lush dinner last night (he is such a good cook but won't admit it) and he bought me flowers and Strawberry Laces (which I have snarfed already, *the laces, not the flowers lol* I must be on the mend lol)  Anyways... I have been eyeing up a pair of shoepods for several weeks now... and last night they accidently fell into my basket and checked themselves out and are now on their way to live on my feet!  Thing is, I live in Birki's all Spring/Summer/Autumn because they really help my posture, which helps my back when I am standing up teaching or doing shows.  And being as it is now Winter and wet and chilly and yukky, I needed a proper pair of shoe Birki's... and being as I have the mental age of a toddler, I neeeeeeeded these sooooo much.   Aren't they just the cutest!!!!


Right, I shall away.. I have a date with my new book, tis called The Dark Heroine and is about... vampires! I know, more vampires, I am obsessed with them... not long til Breaking Dawn II now!!!  Oh and today I am going to venture out into the big wide world and take some stuff to the Post Office.  Our local one is situated in the Co-Op which is just undergoing a re-fit... which means it is closed... which means I have to drive into town to go to the nearest one.  Which means... yep, another foray into THAT car park, I shall have my wits about me this time though.  If you hear high pitched squealing you will know that it is me, doing the involuntary splits again!  Have a good day all... thanks for looking.... TTFN!

Hels x

Thursday 25 October 2012

Best Laid Plans...

...firstly, thank you for all your lovely messages, muchly appreciated indeedily!  I thought I was over the worst, woke up feeling brighter... but... uh-oh, nope, it is back!!! Yikes!  It has to be a bug for it to last this long.  Anyways... I have had a rummage in my samples box and found a journal page that I made for my last shows on Oct 10th and thought I would show you that today.


Using those fab new Stencils For Art from the wonder that is Wendy Vecchi's Studio 490, along with some of the gorgeous new release stamps, I have made a page for my "building-it-ever-so-slowly journal".  I have, over the past two years, started several journals, all of them in book form... and all of them leaving me a bit wanting upon completion of a page.  I think the problem is actually the book itself, if I muck up a page, I have to live with it... whereas if I do it this way, making a page and then punching holes and adding to a binder over time, I am more likely to enjoy it!  And it is true!  The base of the page was achieved using Distress Stains and Distress inks and then I added some Stencils For Art using Rusty Hinge DI for the flowers and Forest Moss for the leaves.  The honeycomb background was done by randomly inking the stamp with Walnut Stain so it is a rougher more patchy effect.  The Bee is stamped onto his appropriate Art Part and coloured with more DI's and then bobbed onto the page with Cosmic Glue.  The words are from the Funky Words stencil... LOVE this one loads and I used a Sharpie Marker to write them so they are nice and permanent.  I scribbled a few lines of faux stitches around the edges to finish off the design.  In all, it took about 15 minutes... super speedy and super effective... and I am happy to add this to my Journal Binder!


Anyways... I shall away... to be honest, I feel as if I have been wrung out, no energy and ever so sleepy... boo-hoo (milks it for sympathy lol)  Thanks for looking... have a good day!  TTFN

Hels x

Wednesday 24 October 2012

Normal Service....

...will be resumed soon (hopefully!)  I thought it was the revenge of the toffee-apple that I scoffed on Monday evening (yes, I am still a big kid, love toffee-apples!)  BUT.... no, I think I have somehow managed to pick up a gastric bug.  And I have become very acquainted with the bathroom... I shall stop there otherwise I may divulge Too Much Information.  Hopefully I will be able to be back tomorrow with something new to show you... in the meantime, I am off back to bed... TTFN! x

Tuesday 23 October 2012

Time to Be You...

..cor blimey and thrice! I was so inspired by the colours of Mother Nature that I got all unnecessary and made a tag using the colours in the Distress range that match what I can see out of the window in the Room of Stash (and no, not murky dirty streaks on the window... as if I would have those... ahem!)   Anyways... wafflings aside, tis my day for The Stamp Attic DT and all the deets on how I made my project for this week are HERE on The Stamp Attic blog.


I had a bit of a scare yesterday morning you know.  So, the parking here in Wellingborough is free... everywhere is free (thank you Mr Council Bod, makes a nice change!)  Anyways, it would be just plain wrong of me to moan about certain parking facilities wouldn't it?  So, I shalln't moan, oh no, not a moan... more of an.. erm.. observation.  Wellingborough is only a diddy little town and there's not much in the way of high street about it but it does have its very own shopping centre, The Swansgate.  And, attached to said shopping centre (ok, it is an under-cover mall like thing with about 30 shops max, but it is ours and we love it lol)  is a car park, one of those multi-storey affairs, you know the type, you go up a load of ramps in a spiral to get to each level.  Well, it has been noticed by moi (especially me, my parking ain't my finest talent) that the kerbs are rather high on these rampy bits... and being as Ferdy has a turning circle of a Sherman Tank (actually, scrap that, he has a turning circle of a dead Sherman Tank) I am continually bumping over the high kerbs and once even scuffed an alloy *yes, Grim had to be in the car for that event.... he did have the good grace not to laugh though*  Well, yesterday morning was a right old mucky day... roads wet, foggy... basically a typical Autumnal English day.  What I didn't figure when I tentatively drove up the first ramp in the multi-storey was the ASF (what ever the chuff that might be) light to come a-flashing on and for the front end of Ferdy to literally slide away from the direction I was steering.  Thank the Lordy above that I do pride myself on common sense and managed to get out of the slide.  Only for it to happen again at the very next ramp.  Thank the Lordy above and thrice... there was a space on Level 1, phew!  Turns out that the inside of the multi-storey floor has been painted with what I can only describe as greasepaint... add to that the water from the mucky wet cars and whatcha get?  Yep, skating rink.  I very nearly made a buffoon of myself (what again? so soon after the last time?) when I stepped out of Ferdy and my leg went a-sliding away... did you know that 42 year old women who are ever so slightly unfit (ok, VERY unfit) are more than capable of doing the splits? Well, of course, that could only be when hanging on, very unglamourously to a car door.  Upon that bombshell I shall love ya and leaves ya... I have a few sore muscles that didn't realise they were muscles until then that need soaking in a hot bath.  Thanks for looking... TTFN!

Hels x

Monday 22 October 2012

A Bit of This and A Lot of That...

...aha, you see, I actually managed to title a post properly!  Anyways, this is a photo heavy post, I have a lot to show you!  Starting with a Studio 490 creation from my demo day on Saturday.  This is using the Hearts, Love & Stars Art Parts pack, some Tim papers, some Distress Ink, some embossing powders and a Wildflower from the Art Part/Stamp set. 


Covering Art Parts with paper is soooo simples!  Pop some Cosmic Glue (or other strong wet glue) onto the Art Part, stick to the back of your paper, use a craft knife to cut the shape out, sand the edges to tidy them up... tis done! Really that easy!  I covered both hearts with Tim's Lost & Found papers and sanded the edges then blended them a smidge with Aged Mahogany and then edged them with a smidge of Queen's Gold Embossing Powder (my fave gold).   Sticking them together, adding the word - which is coloured with Aged Mahogany and adding smidges of gold embossing to that too, is again sooo easy!  (remember, I can't do difficult lol)


The little heart is an Embellish Your Art Blossom Bucket piece, starting life as cream and with a bit of Plum Archival and a spot of overstamping with Black Archival made it match my design.   If you do use Archival's to colour your embellies, just remember to heat them to set the ink... otherwise you end up a mucky pup!


Remember yesterday  I mentioned my little helper Bayleigh?  She is a little sweetie indeedily.  Addicted to crafting at the age of 10 already and she totally gets the "need" for things too ;o)  Here is her lovely creation that she made especially for me.. bless!  I shall treasure it.   And the other pic is of us together.  How cute is she!!!   


I said this one is heavy with pics... well, it is!  Remember Albert the Spider whom has been living with us for about 12 weeks now?  Well, he is a silly sausage, every night I go out and watch him making his web.  And for the past few days I have been telling him to attach his web to the branches of the Acer because the leaves are all falling off.  Did he listen?  NO!  Here's his web this morning... tis still a work of art, just a wonky one.


And here he is... hiding behind a garden ornament... I don't blame him though, the weather is pretty ropey out there today.  About an hour ago, I couldn't even see the trees properly at the bottom of the garden. 


Speaking of trees... a couple of the trees in the Spinney are filling me with big smiles.  I love this time of year, the colours that Mother Nature throws at us...the only drawback is that there are very lots of leaves on the trees... and very lots of them will be all over our garden in a few weeks time... good job we have one of those sucky-uppy garden vaccuum jobbies!


Oh and whilst I was prancing about outside (am still in my jammies too, don't tell anyone!) I spotted this web, isn't it a beauty. Obviously this spider has more sense than Albert.  Trust me to adopt a thick spider lol


Yesterday was one of those days!  Up stooopid early for our trip to Brands Hatch.  We had planned to set up on the South Bank and I had the camping stove and breakfast stuff ready to cook when we got there.  Best laid plans and all that. Because it was so wet, they had closed that part and everywhere was pretty full of cars already parked.  So, we were directed under some trees.  Which is where it got a bit dicey.  That was like a bog... and Gordon Golf wasn't liking the slippyslideyness of the mud.  Thankfully Grim is calm in a crisis and got Gordon out of the mud and we moved to another bit that wasn't quite as boggy.  Still mucky muddy though but we had enough space to get the old camping stoves out.   Thankfully Grim had an old blanket in the boot of the car so I could stand on that.  I was wearing my "new" trainers, which are beige and pink... mmm, quite.  They are now beige and pink with mud splats! (you can just see them in the bottom right of the photo)  Mind you, the bacon, sausage, egg and mushroom rolls were rather yummy :O))


Then the heavens opened.  And it rained.  And rained some more. And then, just for good measure, it rained even more and got blustery.  Plato's car is ruuuubbish in the wet so we knew his title chances were shot.   This photo was taken about midday - I know, how dark and yuk is it!!! 


So, we made an executive decision to leave right after Race 2, pace it home and be back in time to watch Race 3 on the telly.  Which is what we did.... finally thawing out and drying out several hours later.  Remind me next time I have a hare-brained idea to go and sit outside in late October that it is better to sit indoors and watch the telly!  Anyways, I have awarded meself a day off today... I am going to poddle into town and have a mooch around the shops, then I am coming home and snuggling in front of the fire with my AlfieCat and we are going to watch an old film... not sure which one it will be yet but it sounds like a plan right?   Thanks for looking!!! TTFN

Hels x

Sunday 21 October 2012

Sunday Stamper - Week 228 - A Taste of Honey

Goooodly Morning Stampers and a very happy Sunday to you all! Hoooge thanks for all your gorgeous metalic creations for last weeks challenge, I saw some completely awesome techniques on my hoppings, especially one from Buttons - check it out HERE.  This weeks theme is one of my fave songs ( of course, The Beatles) and I figured that with Autumn upon us, the trees and hedgerows changing colours, along with some gorgeous new stencils and stamps out there that the theme this week would be... HONEY COLOURS/HONEYCOMBS.   To join in is simples: make a little something, it can be anything you fancy.  Add in the theme and some stamping and then pop back here with a link to the place you are showing your entry.  If you don't have a blog you can join in via email, Facebook or any other web-photo-hosty-thingy.  The theme will remain open until 21:00 Saturday 27th October 2012.


My entry this week is actually a sample from my recent shows that I haven't had chance to blog yet. It is a Studio 490 Spool, inked, stained, stamped, sanded and decorated with Grunge, Art Parts and Embellish Your Art goodies.


The base colours are Bundled Sage Stain with a smidge of Walnut Stain around the edges, then they were sanded and then overstamped with the F A B new honeycomb stamp from the Studio 490 Art For You stamp set.  I added in some Art Part Bugs & Butterflies which co-ordinate with that stamp set too.  My smidge of honey colour is on the Star (from the Heart, Love & Stars Art Parts) and the Wildflower.  The butterflies are Grungepaper, coloured with Faded Jeans DI and the Art Part butterfly was blinged up with Cosmic Shimmer Vintage Green spray.


I am speed blogging, can you tell?  It is about 8.30pm Saturday evening... I have had a F A B day at Let's Create in Coningsby - thank you to Jo & Mark for hosting the in-store demo and making me so welcome again.  Also a hooooge thank you to all the lovely ladies who stopped by to watch... and a special mention to Bayleigh, who is 10 years old, addicted to Studio 490 and ink... and was my very special helper for the afternoon, bless her, I wanted to bring her home with me!  She made a gorgeous piece of art for me, I will give it pride of place here tomorrow.


Oh and the reason I am scheduling this post?  Well, today is THE day!  Oh yesh, today is the final three rounds in the British Touring Car Championship at Brands Hatch... and we are off to watch!  I am doing a "sun-dance" at the moment (please don't rain!) and of course, we will be cheering on Jason Plato.  There are three contenders for this years championship and we so want Plato to win.  SO much so that we are up uber early and off uber early so we can get a good spot to watch (like getting out of bed at 4am early!)  If you are watching it on the telly, look out for us... we will be the sensible ones with the brollies and blankets!  (well, I will have a blanket, if Grim is a good boy I will share it with him lol) Thanks for looking... have a great day!  TTFN

Hels x

PS... GO PLATO!!!!

Saturday 20 October 2012

Be My Guest...

...actually I am the Guest!  A few months ago, Lousie asked me if I would like to be a Guest Designer on the Calico Crafts blog.  Oh yesh, please!  I had a whole heap of fun getting very painty and embracing my inner altered self (I love altering things but I haven't had much chance in the last few months.)  So, I chose a papier mache book for my first piece.  All the deets and more piccies are HERE on the Calico blog, please do hop over for a nosey :O)) oh and while you are there, you might want to scroll down because there are some totes-amazeballs projects there to feast your eyes upon!  Here's a sneak peek of my project - I went all Christmassy again! 


I am scheduling this post to publish, I am reaaaaally hoping that it works, this new Blogger interface (ok, I have had it for nearly three weeks now) is still foxing me.  Not difficult to fox me at the best of times... I am sort of getting used to it but have lost count of the amount of times I have turned into a screeching banshee everytime I hit the wrong button lol   And the reason I am scheduling?  Well, I am up early early this morning because I am driving up to Coningsby to Jo Channon's Let's Create store for an in-store demo day.  I shall be playing with Distress, Studio 490 stamps, Art Parts, smidges of Grunge and Idea-ology will be thrown in for goodly measures too.  If you are coming along please say hi and introduce yourself... I love to put faces to blog and Facebook names.   Right, I shall away... I can smell dinner burning... again lol   Thanks for looking... TTFN!

Hels x

PS.  New Sunday Stamper challenge tomorrow!  Another scheduled post... finger's X'd eh?

Friday 19 October 2012

S is For...

... Spooky, it can also be for Snazzy (see what I did there?)  because it is time for my next project for the Snazzy DT.  All the deets are HERE over on the Snazzy blog... and here's a sneakitty peekitty peek of my second creation.


Remember the "spider in the bed that was supposed to be scary and totally wasn't?"  Well, he has been liberated and is now adorning this shadowbox.  And I is absolutely chuffed to little mint balls after one of those "I wonder if that will work" moments last night.  So there I was putting finishing touches to my project and I wanted to add spiders web to the frame... in the form of a cool Tim stamp.  But.  The frame is blackAnd I didn't want to stamp in white paint.  A lightbulb went off in my bonce... use Ranger Glue & Seal and sprinkle it with Rock Candy Dry Stickles (LOOOOVE this stuff) and whey-hey, it worked a (trick or) treat!


Check out my Hallowe'enified nails!!! When we went shopping yesterday afternoon I spied this in Boots... I was after myself some of that beige nail varnish (which I managed to find - the last lot made my skin look like I had died several years ago) and I spotted this Crackle Nail Varnish... how cool is that!!! I painted the first three fingers with red and then slapped the crackle over the top... and the ickle finger has the beige with the crackle over the top.  I am liking the beige for a more subtle (if crackled fingernails could ever be subtle!) and the red for a more spooktastic look.   Anyways... I must away, there is a noise coming from my Room of Stash, I fear it is a sobbing noise... yep, it is, stash, all misplaced and chucked all over the place... needing a nice tidy up...  Thanks for looking... TTFN!

Hels x

Thursday 18 October 2012

L is For...

...Late!  On Sunday, after my last workshop of the day, I popped back to my demo desk and was greeted by some lovely ladies (sorry, I didn't get your names) and I was doing a super speedy demo with Distress Stains and the gorgeousness that is Studio 490.  Well, because I was so engrossed in what I was doing, the show actually closed!   Whooops!  And I didn't get a chance to finish my creation.  Anyways, I promised I would blog the finished piece, so here it is, better late than never right?


The base is the middle of a Rectangle Art Part, coloured with Crushed Olive Stain, dried, another coat of Crushed Olive for goodly measures and dried again.  A good tip to remember when you are colouring your Art Parts with wet stuff, dry it straight away.  It is, after all, a paper product, leave it to dry naturally and you will get little bubbles under the paper where it has separated the squished (sorry, compressed) layers.  Anyways, as well as inking the base, I also stamped it.  Firstly with that luuuuush honeycomb background from Art For You - I wanted a rough look so only inked patches of the stamp with Olive Archival Ink.  A quick zap with a heat tool to set the Archival and on to the next step, which was adding the floral border along the bottom edge.


This was simples to do: ink up the whole stamp with Olive Archival and then go in with a babywipe to remove the green from the flowers, then use the corner of a Vermillion pad and ink the flowers, stamp, voila, border!  I just so happen to lurve this stamp - I think it is probs one of my most used in my collection.  No self respecting Art Part would look complete without a bit of sanding and aging, which is what I did around the edges before drawing a rough couple of lines around to add some faux stitches.  The Wildflower Art Part was stamped with the co-ordinating stamp, coloured with DI/DS and popped onto the base with Cosmic Glue (THE best glue!)    Adding a word is always a good thing so I used the Funky Words Stencil for Art, using a Sharpie Paint Marker to draw through the letters.  Finally, three butterflies stamped onto Grungepaper with Jet Black Archival and then cut out, coloured with Fired Brick and popped onto the piece.  A smidge of rusty wire makes a hanger and ta-dah!  We are done.  See how simple the Art Parts are to use!  Seriously, I can't do difficult (ok, I can be difficult but that is a whole different thing lol) which is probably why I love my Art Parts so much, simply ink, colour, stamp, paint, paper cover etc and assemble!  


Anyways.  Let me tell you about my little jolly japestering that I did last night!  I got a packet of those Hallowe'eny plastic critters from the £1 shop last week.  In the packet were two big fat black spiders.  One of them went onto my Hallowe'en H earlier in the week so I was left with one big fat one.  So, whilst Grim was otherwise occupied (playing Angry Birds.... am sure he is addicted to that game lol) I crept into our bedroom and snuck said spider under the duvet on his side.   And waited.  And waited some more.... and tried my best to get him to go to bed... I was impatient you see... which is never a good thing when you have a jolly jape in-store.  When he finally won his tournament (seriously, I am singing the Angry Birds song in my head alllllllll day... and allllll night rofl) he went to bed... and.... pulled back the duvet... and... *there I am, poised to pee my pants* went "oh, a spider"  And that was it!  Pah!  I shall have to get up earlier if I want to fool him I reckon.  Well, unbeknownst to me, he has put said spider under my side of the duvet.  I went to get into bed and do admit to having a little jolt of "what the ????" when I pulled back the duvet.  Akkk, I am rubbish at practical jokes, methinks I need to go and buy one of those fake dog-poo's and see about putting that in his work boot.  (don't tell him though, that would ruin the surprise!)   Right, I shall away.  I had a lovely afternoon yesterday, we went shopping... and came home with a bag of cat lit (oh boy, we know how to live on the wild side!)  But.  We did see a rather splendid dining room table... so I think we may go back today and look at it again... you never know, I might come home with a tin of cat food today *stop me now, I can't cope with the excitement rofl*  Thanks for looking... TTFN!

Hels x

Wednesday 17 October 2012

R is For...

...Rain!!!  I know, all this week I am all "this letter is for..." bear with please do, I have run out of ideas for snazzy blog titles (the old grey matter has gone on holidays lol)  Anyways.  Rain! How much rain could have possibly have fallen in the past 12 hours?  A mental amount, that's how much!  My poor little pet spidey out in the garden is bearing the brunt of the stormy weather too.  Oh yesh, he is still with me... been about 10 weeks now, and yep, every night I go and watch him eat his web and then re-build it.  (small things occupying small minds and all that...)  Well, I neglected him last night - far too wet and windy.  Trouble is, he attached the bottom of his web to my Acer (tree, not laptop *snort*) and it is now losing its leaves.  So his web is now looking somewhat precarious.  I have told him he needs to shore it up to the branches... think he will listen?


Anyways... on with todays offering.  This here piece was one of the demo creations from the weekend.  And, a complete doddle to make.  Take an Art Part Heart (from the Heart, Love & Stars set), colour it all over with Tumbled Glass Distress Stain.  Dry thoroughly. Pop the new Brick Wall Stencils for Art over the top, blend Seedless Preserves DI over the top.  Remove stencil, dry with heat tool.  Blend lightly around the edge with the Seedless Preserves, dry again, sand the edges with a sanding block/emery board.  Get rid of the dust with a bit of a swoosh over the surface.


Colour the Art Part Scallop (from the Sample Pack) with the Tumbled Glass, dry, edge with Seedless Preserves, dry, sand and then stamp the sentiment with Jet Black Archival - yep, that is a stamp, how cool!  Stamp the Echinacea onto the corresponding Art Part (Wildflowers sets), colour the leaves with Crushed Olive Stain. Dry, then blend Peeled Paint on the edges.  Use Cut & Dry Nib to colour the petals with Seedless Preserves, colour the top with Rusty Hinge Stain.  Dry the lot and then attach to the heart.  Stamp two butterflies (Art For You set) onto Grungepaper and colour with the same colours of Distress Ink, colour the wings on the reverse.  Add a Creative Expressions corner to the point of the heart - these are so cute and easy to bend too.  Snip into two more corners, making bodies for the butterflies.  Use a Sharpie Paint Marker to add the word "art" to the heart using the Funky Words Stencils for Art.  Punch holes with Crop-a-Dile and add rusty wire.  Assemble as shown.  SIMPLES!  


A lot of peeps think that because the Art Part pieces are 3D that they are hard to put together.  Wrong! They are so easy... just pick what you want to use, colour with your chosen ink/paint etc or cover them with paper/cardstock/fabric.  Assemble, add some fancy bits... and you are done! Give it a go!!!   Anyways... I reckon that is enough waffling from me for one day.  I have a day of jobs ahead of me, lots of inkyness and of course, the Room of Stash will be a total tip by the time I finish lol   Thanks for looking... have a good day!!!  TTFN

Hels x

Tuesday 16 October 2012

C is For...

Christmas!!!   Oh yesh, I have been playing for my Stamp Attic DT today - all the deets are HERE on the Stamp Attic blog.  I usually am the one who is haring about like a loon on December 1st, no stuff made and all that.  Well, this year I am being super organised and am getting ready early!  Well, my crafting is getting ready early, not so sure about the rest of it yet lol   Here's a sneak peek of the tag I have made... please do pop over to see the rest of it :O))


C is also for.... cruddy internet!  I am grumpy today because yonder t'internet has been playing up biiiiig stylee this past few days.  Yesterday it was practically non-existent and today it is sporadic.  I just did a broadband speed test... it was 0.79mb.  I know, slower than dial up right!  Tis the trouble with this daft old ADSL rubbish that we have to put up with.  I so wish that Mr Virgin or Mr BT would dig up our road and bung some cable in... we were spoilt at the old house and even now, 2 1/2 years later I miss it.  (tis the only thing I miss about that house though lol)   Anyways, enough of the whinging about my lack of internet and onto what happened yesterday!   Right, so Grim has gone to see his BFF for an overnight stay.  I am full of ideas what I am going to do to keep myself busy and all that.  So, after dropping him at the station, I came home, settled to watch Strictly from this weekend so I wouldn't have to avoid the radio all day.  Watched that, corrr, wasn't Denise amazing!  And Colin Salmon, of course, he was the best (snort)  Once I had finished watching that I decided to go and get a shower and spruce meself up a bit.  This was 11am. Well, I happened to notice the bed and how inviting it looked.  Well, 40 winks won't hurt will it?   Aha, yep, actually it turned into more like 40,000 winks.  I woke up at 4pm!   And then went back to bed at 11ish last night and slept right through til 9am!  I think I must have needed to re-charge the old batteries.  The fact that I look like I have slept for that long isn't helping.  I have an almighty pillow-scar down my cheek, very attractive eh?  With that delightful image, I shall say, thanks for looking.. TTFN!

Hels x

Monday 15 October 2012

H is for...

....Hallowe'en!!!  Oh yesh, it is time for my Snazzy DT for this month *and yes, I actually managed to get my blogging done on the right day this time lol*   We have been playing working (yeah right!) with some absolutely gorgeous papers from Carta Bella and the new Tim Holtz Hallowe'en Blueprint stamps (more gorgeousness!)   To see my first project in full, along with how I made it, please CLICK HERE.  Here's a sneaky peeky for you to look at.... spooky isn't it!!! Mwhahahaaaaa (that was me doing an evil laugh sound... which is so much better than the funky monkey sound I have been making all weekend)

smashing pumpkins... dontcha think?  **groan**


This weekend passed in a blur or ink, laughter, more ink, more laughter and above all... friendship.  Firstly I have to say, THANK YOU to everyone who took part in my classes at the Big Stamping & Scrapbooking show in Kettering.  Over the course of the weekend, 70 unsuspecting ladies (plus one ever so cute little fella and one ever so cute little lassie - who both embraced the inkiness and got thoroughly into the grungey crafting we were doing - and they were both only 10!  I know, their Mum's are starting them young right?)  where was I?  Ah yes, unsuspecting ladies... bless 'em... some even came back to do another class!!!   I got to meet up with lots of blog friends which was lovely, putting faces to names, not to mention voices to their comments they leave here.  And also a thank you to all the lovely peeps who stopped by to see me making a mess,   ...demoing... and for being so complimentary about my samples and my hat!  Oh yesh, the hat was on the head the whole time... it got missed a few times because the pics I posted on Saturday actually make it look mahooosive, it isn't, it is about 3" wide on the brim... still, it stayed put!   Oh and... I lost an earring... bummer, I LOVE those earrings... until Katy very kindly stepped on it in the classroom and found it... not a smidge of damage, I was very chuffed about that!  And how flukey that it was found too!

don't worry, it isn't real... tis plastic and doesn't have fangs lol


And finally... a big, mahoosive and chunky funky thank you to Gillian for making this weekend one of the most hilarious I have ever had. Part of that was Grim's fault... he got this app thingywotsit for the iPadthingywotsit and it is a little kitty... and when you talk, he copies you and says what you just said... and then you can pat him and he purrs... and you can tap his nose and he sneezes, touch his feet he giggles... totes-hilarious... imagine, 3 fully grown adults falling about laughing in a kitchen over a computer generated kittykat.  Alf was not impressed in the slightest you know.  Anyways... I shall away.  I have to be honest, I am fair dinkum pooped and I feels like a good old snoozle is in order.  Thanks for looking... TTFN!

Hels x


Sunday 14 October 2012

Sunday Stamper - Week 227 - Metal Gods

Goooooodly Morning Stampers and a very happy Sunday to you all!  Many thanks for all the fabulous frosty entries to last weeks challenge.  This week I am embracing my inner rock chick in homage to one of my fave bands when I was a teenager (sorry Dad for all those "loud" nights with acres of scarves and gallons of eyeliner!) Judas Priest.  The theme this week is.... METAL.  Be it a smidge or a whole shed load of the stuff, all you need to do to join in is make a little something, it can be anything you fancy... add in the theme and some stamping and then pop back here with a link to the place you are showing your entry.  If you don't have a blog/Picassa/webbyphotojobby, you can join in via email or on Facebook.  The theme will remain open until 21:00 Saturday 20th October 2012.


On with my entry for this week.  The sharper eyed amongst you may have noticed this piece on show on Wednesdays show and at the Kettering show too.  I am chuffed with the way it turned out... I was going for the whole "butch metal meets girly butterflies" look.   I used that fab metal foil sheet that I had on the show on Wednesday, embossing with the Couture Creations Heavy Duty & Replacements folders.  Once embossed stuck the stamp to an Art Parts Rectangle Frame... using the Heavy Duty on the frame and the Replacements on the insidey bit.


I slathered (cool word huh?) Black paint right over the top of the metal, allowed it to dry off a bit and then removed some of it with a paper towel.  The paint sits inside all the ickle crevices to give an aged look.  To add a smidge of metal shading, I added dabs of Bronze paint randomly over the metal.  I then took a bit of sandpaper to add some distress to the metal and added smudges of black and bronze paint with my finger.


The butterflies are Studio 490 from the new Art For You set... stamped onto Grungepaper and coloured with Distress Ink.  The Art Part flower was stamped with the co-ordinating stamp from the Wildflower set, embossed with clear and then coloured with Distress Markers.  The LOVE is from the Love, Hearts, Stars Art Parts set, painted black, smudged with more metallic paint and then they were all glued with Cosmic Dries Clear glue.  The finishing touches are a few bits of Idea-ology and a couple of fancy corners.


I had a fab day at the Kettering show yesterday - thank you all who came to watch me demo and took part in my classes... I had a lovely time and it was so nice to meet both old friends and new.  I really must away now though, I am fair pooped and needs my beauty sleep... Thanks for looking... have a F A B Sunday and if you are popping to the Kettering show, please do stop by to see me and say hi!  (I will be the one with the mahooosive zit! lol)  TTFN!

Hels x

Saturday 13 October 2012

If You Want To Get Ahead... *with Winner*

...get a hat!  Oh yesh, indeedily and thrice, I am sooo chuffed with this little fella that has been lurking in the Room of Stash for months!  More of that in a mo... firstly, HOOOGE thank you's to everyone who left such wonderful comments on yesterdays post. I had a total of 76 comments and having fed this into Mr.Random.Org he came up with #15 as the winner... which tallies with the comment left by DOT'S DABBLES  Please can you email me your addy and I will pop your pressie into the post :O))


On with todays offering.  Like I said, I have had this little titfer for yonks.  I actually bought it for the Jubilee... wore it to the shops and had some funny stares because it was actually sparkly blue with red, white and blue ribbon attached to it.  As ever, I forgot to take a before pic...  


I slapped some black paint all over the hat and let it air dry for a day or so - the paint soaked right into the felt underneath and took foreeeever to dry!  Once dried I left it on the shelf for several weeks, ignoring it really... poor little thing.  So, yesterday afternoon I decided to punk it up in time for the Big Stamping & Scrapbooking Show in Kettering this weekend.  There's a whole heap of Idea-ology attached to it, some with hot glue and some with the wonder that is Cosmic Glue.


I had a fabby day yesterday - Gillian is in the Room of Stash!  She has come to stay for the weekend so she can have a wee shop at the show.... and guess what!!! She has given me a make-over!  Oh yes... after 42 years of having feathers for hair, I now have lovely sleek locks.  All down to some GHD Hair Straightners and a mahooosive amount of patience (on Gillian's part, I was more than happy to sit and be preened lol)  Whether or not the gorgeousness will last overnight is debatable.  As I have told you frequently, that ugly little critter that lives under my bed may well brandish his extra strength hair gel and sink plunger my face - he normally does ... finger's crossed he will behave!  Whatever the state of the old barnet, I shall be sporting my new hat all weekend... well, until I forget I am wearing it and bash my head against the desk... like I have never done that before... not lol


Anyways, I shall away, tis time for bed... if you are going to the show this weekend, please do pop by to say hi - tis lovely to meet up at these shows... faces to names and all that.  As ever, have a FAB weekend... oh and a brand new Sunday Stamper theme will be posted tomorrow too!  TTFN

Hels x

Related Posts with Thumbnails