Hello!
Well, it is time for another challenge here on the Sunday Stamper. Thank you to all of you who joined in last week; I was so impressed with all the marvellous creations that you all made, they were all so different and gorgeous!
This week the theme is Dogs.
For my entry I have made a card using a new stamp I have just bought....I know, another one!!
His name is Rufus and he is very cute indeed and he is from Magnolia Stamps.
I used the brand new range of papers from K & Co called Blue Awning. These are so gorgeous that I did feel a little guilty for cutting into them, but hey, what is the point of having beautiful papers and not using them? Well, that is what I keep telling myself!!
I cut a window shape into some paper, stamped Rufus on another piece of paper and popped him behind the window. Next, I cut some more papers and arranged them onto a card. All the edges of the papers were coloured with Prussian Blue Chalk Ink. I then used Studio G alpha's to make the little message mats and popped these onto the card. Finally, I stamped Rufus again, cut him out and attached him to the card using 3D foam.
I hope you all have lots of fun with this theme, please remember to add a link to your Blog when you post that you have made your work of art!
Thanks
Hels x
Saturday 31 May 2008
Sunday Stampers - Week 18 - How Much Is That Doggy In The Window?
Friday 30 May 2008
Tilda Goes Purple!
Hello,
I have made another Tilda Card with some fabby new papers and flowers I treated myself to this week :O))
The papers are by Daisy Bucket and are heavenly, and double sided too!! I always love having double sided papers cos I think then that I have a bargain!!
The flowers are by Petalloo and they are come in a slidey box and are delish colours....and super value too :O)) I used a brad and pinwheel from my stash and added them to the centre of the flowers.
The alpha's are by StudioG and the colouring in is achieved by using Faber Castell Aquarelle watercolours pencils. I have never used watercolour pencils before and my lovely friend Andrea came to stay this week and brought hers with her and then gave me a quick tutorial on how to use them. Guess what? I now neeeeed some pencils LOL So thank you Andrea, and thank you for letting me use your pencils too :O))
I love this little Tilda stamp, I think she is one of my faves. I have to admit I have just bought another couple so no doubt there will be more cards appearing here soon....I am completely addicted and totally converted too LOL
*but I still love my Altered Art/Distressed/Grungey work more!!
Thanks for looking.
Hels x
Sunday 25 May 2008
Tilda Gets Torn!
Hello again,
I have joined in with the latest Tilda Challenge which this week is That's Torn It!
I started by chosing some papers to use - these are from my stash and I can't remember who they are by as the little tear off strip is missing. They are a lovely pink and choccy brown colour though and so yummy too :O))
I stamped Tilda onto cream card and then onto some of the patterned paper, cut out the dress and her wellies and then stuck them over the original image. Then I stamped her pet sheep using the same method - I thought that a pink sheep was rather fetching!!
I matted some of the papers, torn on two of the edges, onto choccy brown Bazzill and then edged all the edges of the papers with Chocolate Brown Chalk Ink.
Finally, I used those StudioG alpha stamps again and made the message mat - I know, I know, loads of peeps use the "ewe" pun but I couldn't resist it :O)) I added a couple of Prima Hydrangeas fastened with a pearly brad and hey presto, Torn Tilda was born!
Thanks to the peeps on the Magnolia Challenge Blog - loved this theme this week.
And thanks to you for reading my waffle and looking at my Blog :O))
Hels x
Sunday Stampers - Week 18 - Sisters Are Doing It For Themselves!
Good morning and happy Sunday to you all!
I will start proceedings by announcing the winner of last weeks Blog Candy and also saying thank you to Cynthia for being my first Guest Designer on the Sunday Stamper Challenge.
A fair few of you joined in last weeks challenge and all of your creations are really special...so thank you for joining in.
Now without further ado......the winner is......
Ah, I think I will post this weeks challenge first LOL :O))
You will have guessed that the theme this week is Sisters. Whether you have one or not (in my case, I haven't) I am sure you all have some stamps in your collections that you can use to make something either for a sister or featuring sisters. Go for it and enjoy!
Here is my effort for this week:
I used a large piece of stampbord and a lovely Lost Coast Designs stamp along with distress inks, and Studio G alpha stamps. I also used a metal file to distress the edges of the stampbord and a scatchy tool to make the little.... er....scratches on the surface of the design!
I think that is all for this week....mmmm, have I anything else to add? Ah yes! The winner of the Blog Candy, chosen at random, is......
*drumroll please*
Rachel P who has her CraftyIdeas Blog here.
Well done to Rachel and I will be contacting you today so I can pop your candy into the post :O))
All there is for me to say now is have fun, get inky and messy and please remember to add your link to this post so I can come and visit your Blog and look at all the lovely creations you have been making!
Hels x
Saturday 24 May 2008
If Anyone Sees It......
Can you please post it back to me!!!
Hello Peeps,
The MoJo has gone!!
Yes, I sat for over an hour in my Craft Room this morning and nothing happened!! Well, that is not strictly true, I made a tag for the swap but it is not what I wanted to make so I gave up and went and sat in the garden.
Grim has this idea that we are going to clear an overgrown patch and make a little seating area. So he started with the clearing this afternoon, I stood about "helping" and was feeling a bit sad cos I love gardening as much as I love crafting and since my accident I haven't been able to do any really because of the pain of the injury. Anyways, there I was "helping" and pointing at things that needed digging out when all of a sudden I spy a little mossy ball in a branch of a dead conifer.
Aw, how lovely, it is a birds nest. The birds have obviously had their brood and moved on but they left this cute little house and a little broken egg just below it. I took a piccie of it to show you all! Alfie decided that he wanted to have a look at the nest too...and then thought he would give it a little taste too!!

Then, I noticed something moving in the corner of the patch, and there sat a big fat toad. He was a darkish grey in colour and had the most beautiful golden eyes, they were almost metalic looking. Needless to say I picked him up in gloved hand, had a little chat and then popped him under a big bush so he has a new home. I forgot to get a piccie of him though.
I could ramble on all evening about my lack of MoJo but I fear I would bore you....what do you mean you are already!! :O))
I have to pull my finger out soon though, I have a brand new Sunday Stamper theme to do for tomorrow!!
Hels x
Friday 23 May 2008
Housey, Housey
Hello,
Houses seem to be all the rage at the moment don't they? A lot of my friends are making them and being as I always have to copy my mates, I made a house last weekend. However, after I showed it to Grim, who laughed and then said it looked like a Space Rocket and then changed it to something very rude that I will not repeat here... I binned it! :O))
Then, I saw it sitting there, in the bin, looking a little bit dejected, so I salvaged it and altered it a bit and then decided that the bin option was the best thing for it. Then, just as it was on it's way to be recycled, I changed my mind and left it sitting on my desk....where it has languished all week.
So, here it is. It isn't what I intended it to look like, nor is it my favest piece I have ever made, but I have grown rather fond of it!!
Using a hand drawn template, I cut out the shape and then cut out a window. I used Distress Inks and stamps from PaperBag Studios and Catslife Press to decorate it. I added the little bird and the charm to the chimney as a last resort LOL
Thanks for looking and you can be as truthful as you like....honest opinions please!!!
Hels x
Tuesday 20 May 2008
Tilda Goes Hippy Chick!
Hello,
You know I said the other day that I was getting a little fond of Tilda? Well, I have just got a few more stamps LOL :O)) Oh dear, I can see this is becoming an obsession....I won't buy any more though, honest, I won't...well, not this month anyway!! :O))
Today I made a card using one of the new stamps.
I used Adirondack Inkpads in Currant, Stonewashed, Denim, Espresso and Butterscotch and a waterbrush to colour her in and added a little bit of make-up to her again!
I used those most divine and heavenly Fleuriste papers by Cosmo Cricket along with a few of the flowers from the diecut sheet that comes with the paper pack. I also used a paper distresser to make the edges shabby and then used a babywipe dabbed onto the inkpad and smudged about the edges. The little word mat was made using some StudioG alphabet stamps which are so cool, I have a few of the fonts now and they are so versatile as they are small enough to make words but not too small, if you know what I mean! I got the alpha's from The Fruit Pixie, which is such a lovely store to visit!
Oh, and I almost forgot to say, when I was making the flowers up, I used those lovely pearly brads from Dovecraft - and inadvertantly knocked my brad box, which is one of those plastic boxes with 24 sections in it, off the desk, and straight into.......the overflowing bin :O(( I admit I cussed a little bit and now I have the delightful task of going thru the bin and finding all my brads...I guess I have learnt two lessons from this; 1) Always clip the lid back down on the brad box and 2) empty my bin more often!!
Anyway, I would love your opinions on this card.....thanks for looking
Hels x
Monday 19 May 2008
Tilda Gets Beady :O))
Hello,
Tilda has gotten beady this evening in honour of the Magnolia Weekly Challenge theme, which is ....er...beads!!
Now, I haven't got many beads, infact, I only have a few really naff ones that came with a cheapy pack of cards donkey's years ago. So, what was I to do? I have become very fond of these Tilda stamps and I really wanted the excuse to play....so....I rummaged in my jewellry box and found an old bracelet that I hadn't worn for ages. Guess what comes next? Well, armed with a pair of pliers, I took off all the beads and dangly bits from the bracelet and hey presto! I had just what I needed.
The next problem was that the beads are a lovely bluey green colour and I am limited with paper supplies, so after yet more rummaging, I found some offcuts of the Addison range from K&Co. Perfect!! The colours matched the beads ... result! :O))
So, the first thing I did was stamp Tilda holding a flower using black StaZon ink. I then used Adirondack inkpads with a waterbrush and painted her in. To achieve the right tone of colour, I mixed Denim and Lettuce together and got a really nice turquoise, I shall have to remember that one!
The next thing I did was to rummage again for some Bazzill that matched the paper - phew, I have got a lovley stash of Bazzill so that was easy! I matted some of the papers onto the Bazzill and then stuck them to an A5 card.
I matted Tilda onto some of the Bazzill and then made holes using a pokey tool and clipped the beads thru the holes using the jump rings they were originally on. I then used some of the stickers from the Addison range and made the sentiment, matted this onto Bazzill and then popped this onto the card.
Finally, I added some Grand Adhesion flowers, curling the petals to add a little definition to the card and edged all around the card with Chalk Ink.
This really was a challenge card for me and I really enjoyed making it.
Thanks for looking!
Hels x
Sunday 18 May 2008
SO SALSA - Paisley
Hello,
Over on the SO SALSA challenge this week, the theme is Paisley.
I happen to lurve a Paisley pattern and I haven't used it for ages so it was nice to be able to get the Tim Holtz Paisley stamp out and get inky with it!
I started by clear inking and embossing the paisley stamp onto a tag. Next, using Cut & Dry foam, I blended Spiced Marmalade and Dusty Concord Distress Ink over the surface of the tag.
I then flicked water onto it, dried it with a heatgun and then used Worn Lipstick Distress Ink to brighten up the colour a little.
I used a paper distresser and roughed up the edges of the tag, added a little ribbon slider by Maya Road along with some bright co-ordinating ribbon from my stash. Finally, I threaded a few pieces of ribbon thru the hole in the tag and then edged it all with black StaZon ink.
Thanks for a great challenge and thanks for looking!
Hels x
Sunday Stampers - Week 17 - Little Old Wine Drinker Me
Good morning and happy Sunday to you all,
Today is a very special Sunday Stamper day as I have a very special guest designer setting the challenge!
Cynthia, whom many of you will recognise as Rainbow Lady, has very kindly offered to set the theme for us all. If you haven't already guessed, the theme is Wine. However, if you are crafter of refined tastes, you can always upgrade to Champagne :O))
Now, this one really is a challenge for me as I haven't got any decent stamps that have wine bottles or glasses featuring on them. I have got a pack of acrylic Royal & Langnickel stamps that have a little wine glass, but alas, they are so old that when I tried to peel it off the storage acetate it tore!!! Eeeek, what to do?
Well, all was not lost as I managed to peel the grapes image off very carefully and inking the stamp with ColorBox chalk inks I managed to stamp a border - I masked each image so they overlapped.
Next, I rummaged in the depths of the stash cupboard and found a QuicKutz die that is wine glass shaped and punched a couple of these out of white card. I then inked them with the same ink as the grapes and then set to making an ATC. You see, I started out making a card but lack of sizeable stamps meant that a card would have looked very bare, thank goodness for ATC's!!
I tore the border and stuck this to the ATC, then I added the two wine glasses and then used Alpha stamps to make the word Vino.
Finally, I set an eyelet with my Crop-A-Dile and tied ribbons thru it and then added a little bunch of grapes charm.
To celebrate the Sunday Stamper having a Guest Designer, I have decided to offer up some Blog Candy. In order to put yourself forward to win the Candy, please make your challenge item and then post on here, letting me know where you are showing your work of art. The winner will be chosen at random, by means of Grim picking a name out of a hat, on Sunday morning next week (25th May).
Here are a couple of cards that Cynthia has made for the challenge:

If you would like to be a Guest Designer on the Sunday Stamper, please can you drop me an email and I will add your name to the list - don't forget that I do try to have a song title to go with the theme....cos I just want you all to be humming and singing all Sunday long :O))
Here is the piccie of the Blog Candy that is up for grabs when you join in this weeks challenge - included are some stamped images, 6x6 K & Co papers, StandOuts, CraftyBits wooden hearts, fibres, ribbons, gold HOTP card embellies, felt stickers and a little tag book that was free with ScrapBook Inspirations :O))
Have fun and get inky and messy!
Hels xx
Saturday 17 May 2008
Tilda Does a Challenge!
Hello again,
Cor, sometimes I don't have chance to Blog once a week let alone three times in one day!!
Following on from the Tilda cards I made earlier, I have made a card for the Magnolia Weekly Challenge, which this week is "Black and White".
For this card, I stamped the image in black StaZon and then used the trusty waterbrush (see a theme developing here ;O)) to paint in the black Adirondack ink. I used varying amount of water on the brush tip to get different shades of black so the image didn't look too blocky with the colour.
I then mounted this onto silver satin card and then onto black cardstock. I picked some of those lush papers from the Glitter Stack by DCWV and matted these onto black card and then placed them onto a white card.
I then picked some Prima "Got Flowers" and added little brads into the centre of them, layering them up to get more depth.
I added a couple of photo turns to the card, fastened with black swirly brads which are by Queen & Co. I then inked up a Hero Arts message stamp using black StaZon and matted this onto silver and then black card.
Finally, to go with the friends theme, I stamped that cute ickle kitty and painted him with the Adirondack black ink and then cut him out and popped him onto 3D foam and sat him next to Tilda.
I am not too happy with the photo's of this card as the black looks a bit washed out and it just doesn't pick up the lovely glitter on the paper...I think I need lessons in photography :O))
Thanks for looking!
Hels x
Tilda Gets Distressed
Hello again,
I have made the most of the yukky weather and stayed indoors and crafted this morning!! It has taken me longer than usual though cos my back is really sore today and I cannot move too well :O((
I have another Tilda card to show you = this one is using the final stamp of the three that I bought the other day.
For this one, I decided to go distressed and once I had stamped her and the cat, I used Distress Re-Inkers, with a dab of ink dropped onto an acrylic block and my good old waterbrush to colour them in.
Once the colouring in was done, I then roughed up the edges using a paper distresser and then set to colouring and distressing some cardstock. I used Old Paper, Fired Brick and Walnut Stain Distress Inks blended with Cut & Dry foam. I flicked water onto the card and then dried it off with a heatgun.
Next I used some fabby stamps from The Queen's Dresser Drawers and PaperBag Studios to make backgrounds on the card.
I then decided that they looked a little bit flat, so I matted them all onto some gold card and then decided that Tilda looked a bit bare, so I stamped her and the cat onto copy paper and cut them out. I then masked the images I had painted and blended Old Paper and Fired Brick ink over the top so I had a more coloured background.
All that needed to be done was to use my new fave stamp, which says, Gossip, Who Me? and is by The Queen's Dresser Drawers too. I stamped this onto the background card and then once onto the image mat and then stuck them all to an A5 card.
Another strange Tilda is born!! Please tell me what you honestly think to these cards!! Thanks Hels x
Tilda Goes Shabby
Morning,
Following on from the Goth Tilda card I made yesterday, I have now made a Tilda card and made it distressed and shabby.
I started by stamping the image onto cream card using Sepia VersaFine ink. I then used Adirondack pads in Rust, Butterscotch and Espresso along with a waterbrush, to colour her in. 
I matted her onto some brown paper and distressed the edges of the mats, then swiped a piece of Cut & Dry foam that had Walnut Stain ink on it, around the edges.
I used DaisyD and Junkitz papers along with plain cream card and Bazzill Bling for the mats under the image mat and then put together some Prima "Got Flowers" with some pearly beaded brads. I added a couple of photo turns to the corners and then distressed the edges of the main card and rubbed Walbut Stain around this too.
So, another slightly different Tilda....have got my thinking cap on what to do with the other one I have now!!
Thanks for looking
Hels x
Friday 16 May 2008
Tilda Goes Gothic
Hello,
I have just bought my very first Tilda stamps :O)) I have been looking at all the lovely cards that many of you have made and decided to have a go for myself. I know I said I wouldn't get any but I am a little bit bored with using the same old techniques and fancied a little bit of a change!
For this card, I decided to make Tilda a little bit different from usual. I hit upon the idea of making her a little bit of a Goth and this was the perfect excuse to use my most favest images of skulls...I cannot seem to stop using the skulls you know!
I stamped her in black StaZon and then stamped her cat next to her. I then used a waterbrush with Adirondack pads in Black and Wild Plum to colour both of the images in. I did get a little bit carried away with her blusher and eyeshadow and I know she hasn't normally got a mouth, but she would have looked daft without a bit of lippy, so I made a tiny triangle of Wild Plum for her lips.
I matted her onto some black card and then silver satin card, then I made some paper pieces to go underneath this - using gorgeous papers from Rusty Pickle ( again, I think these are RP papers, only I had chopped off the label strip at the bottom the last time I used them!)
I made a little black mat to add some ribbon and a buckle to and also added some brand new chipboard I also just got, called Riff Raff. I added some gems for the skulls eyes and then added a little silver skull charm to the image mat. The chipboard was painted with Raspberry Dabber and the ickle hearts from the eyes are just coloured with black felt tip pen.
I know it won't be to everyones taste but it is just something a little different :O)) I also just want to add that my inspiration for her hair is from my pal Nicky the Minx, who has the most gorgeous pink and black hair!! :O))
Thanks for looking and I would love to hear what you all think!
Hels x
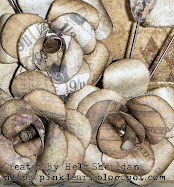
Reddy For Collage
Hello,
I have altered another canvas :o)) This one only took a few hours to do, I am getting the hang of it now and ventured into stamping straight onto the canvas again and this time I managed to get the images right!! I still haven't got the courage to go ahead and stamp the whole thing yet though...that is something I am working myself up to!
For this collage, I used Fired Brick and Old Paper Cracklepaint and applied this to random patches of the canvas and set it aside to dry.
Next, armed with a Stanley knife (and for those of you who know me, you know what a dangerous procedure this could be!) I cut up some mountboard into 1 1/2" squares, 12 in total and then cut a 3" square piece for the centre. I took three of the pieces and painted them with the Fired Brick Cracklepaint and then painted the centre piece the same. These were then set aside to dry and I got cracking with the other small squares.
I used various papers, including Tim Holtz Collection papers I printed from his fabby new CD's...the papers come out really well but I am not so sure that I would print the plain sides, think of all the ink that would use up! I also printed off a couple of postcards and some ephemera too. The other pieces of paper I used were from my oddments box, so I am not sure of their origin but I am pretty sure that one piece was a Rustic Gem offcut.
One of the papers I printed off was the Toy Blocks page. I cut one of the letters out and was really happy to find that it fitted exactly into a bottle cap, so I fixed this in and filled the cap with Glossy Accents and then added a little DooDad letter to match the larger one. One thing I did notice though....when the GA was dry, the letter I had printed had bled a little so the image isn't as crisp as it could be...I guess that is the drawback of using at home printing!!
I added various stamped images to the papers and to the squares that I had coloured with Distress Inks. I also attempted to use Distress Embossing Powder but I still cannot master the use of this and so it looks a little naff!! Needless to say, one of these squares was covered with the bottle cap and the other I stamped onto and then added the pen nib.
I added a few DooDads to the squares to finish them off and then I used a little glass bottle that I have had in my stash for years....I filled it up with beads, pearls (not real ones I hasten to add) mini dice and a few DooDad words. I then rolled up a piece of cork, again this has languished in my stash box for years, and popped this into the top of the bottle. I fixed all the embellies onto the squares using Glossy Accents. I have found that this is just about the best adhesive for this type of thing and it doesn't have a nasty whiff like silicone glue has!
I used a metal file to rough up and distress the edges of all the squares and then lightly dragged a gold Krylon (yes, I know you are really surprised to see me using this pen for a change!!) around the edges of them.
Finally, to add a little something to the final look, I popped Glossy Accents onto some of the stamped images and onto the little Scotty dog too. The majority of the embellies are from The Stamp Connection. They have the most fab Jamboree bags that are full of old pieces of jewellery, games pieces and beads etc and they are perfect for accenting altered art.
Ooops, nearly forgot to say, I coloured the canvas using Distress Inks in Old Paper, Fired Brick and edged with Walnut Stain.
Now, red is not usually a colour that I use a lot but for some reason, this past few weeks I have been using it a lot more...probably something to do with the Fired Brick Cracklepaint which was a gift from my lovely friend Andrea.
Anyways, I would really love your honest opinions of this canvas. I have actually made it for a friend who is not feeling very well at the moment and I am hoping that it cheers her up a bit. No names though, it is a surprise and it is already winging it's way to her house as I type :O))
Thanks for looking
Hels x
Eeeeeek!!!! I have been Tagged ....AGAIN!!!!
Hello!
I have been tagged again!! Now I have had trouble thinking up things for the other two so goodness knows what I will come up with this time!! Anyways, thanks to Roni for tagging me :O))
Here are the Rules:
1. Link back to the person that tagged you.
2. Post these rules on your blog.
3. Share six unimportant things about yourself.
* I have a huge strawberry birthmark on the back of my leg which is really noticable and gets darker for about a month before my birthday, then it fades away again.
* I have freckles - lots of them, and if I ever go abroad, I always end up getting a freckles moustache, so I put sunblock on my upper lip :O))
* I have always wanted to visit Australia and hopefully next year, me and Grim will be able to go there for a month or so.....I would have to take some stash and my laptop though!!
* I can touch type using all my fingers except my left index finger for some reason, this just sort of points at the screen and is grossly underused!!
* I had my nose pierced ten years ago but got a really bad cold about a year later and my nose stud fell out in the night and I couldn't get it back in again!
* My favourite food is fish and chips from Yorkshire...they have to be Northern fish and chips and have to be cooked in fat as opposed to oil.
4. Tag six people at the end of your entry. Ann, Shazza, Claire, Nicky, Tina, Joy
Sorry to do this to you ladies :O))
Hels x
Thursday 15 May 2008
Inky ATC's in a Box
Hello,
I have been getting a bit inky and messy.....at long last!!
This project is for my friend who is celebrating her birthday today, so many happy returns to Bee....and I hope you like your pressie!
This is a Maya Road box with a series of ATC sized chipboard pieces in it.

I used Fleuriste Papers by Cosmo Cricket on one side of the ATC's along with some stamping and on the other sides I have used a mix of Cracklepaints, Distress Inks and stamps.

The stamps I have used are mainly by Stampers Anon from the Tim Holtz Range along with a couple from The Stamp Connection.
Thanks for looking!
Hels x
Wednesday 14 May 2008
Diary of a Cardmaker
Hello,
Nothing new made so far this week :O(( I have been having a really bad time with my pain and I am trying to rest...which is really annoying cos I have so many ideas floating about my head at the moment...and you can bet when I do feel up to getting inky and messy that the Crafters Block will return!!
So why am I posting if I have nowt to show then? Well, last November a lady called Katriel Costello emailed me asking if I would be interested in doing a Reader Story in the Cardmaking & PaperCraft magazine. She had seen my Blog and was interested to know how Blogging had changed my life.
I am usually a little bit shy (yes!! I am really!!! I know you don't believe me, but I am !! ) Anyways, I decided to go for it, after some encouragement from Grim, Andrea and Linda.
So this week, the magazine has hit the shelves and there is my story. For a start, it is a lot more indepth that I expected, there are some lovely pics of cards I have made, it is so exciting to see your own work there in print!! But, the main piccie of me...well, all I will say is that it was a great party and the Pina Colada's went down a treat!! The sunburn is courtesy of the mini heatwave in Cornwall a couple of years ago, I am a fair English Rose (don't laugh!!!) and me and the sun really have not got the best relationship!! The little extra's in my hair were courtesy of the Pina Colada's, namely, cocktail umbrella's and plastic monkeys!! Best of all, there is a photo of the Blog page and there is my little fur-baby Alfie!! Aw, he is famous at last :O))
Also in the magazine is an article about a friend, Amanda, who has become a Stamping Up! demonstrator. This is well worth reading peeps and I would like to say Congrats to Amanda too.
Thanks for looking and if you have visited my Blog as a result of reading the article, I would love you to post here to tell me what you think!!
Hels x
Monday 12 May 2008
Funky Fairy's Blog Candy
Hi Peeps
Over on Funky Fairy's Challenge blog, they have some fabby candy up for grabs.....click here to have a look and make your entry :O))![]()
Rock 'n Roll, Man!
Hello,
I have been itching to Blog this tag I made but I have had to be patient and wait until the main component is actually available to buy as it is soooo new!!
So, what is this new thing I am on about? Well, it is Black Chipboard but with a difference. This is thick, about 2mm, and it has a paler core and backing so it is perfect for distressing. I have used a tag for this project but there are other shapes available; flowers, wings, book covers and smaller tags too.
So, where can you get your hands on this fabbbby new stuff? Here!! The website is in the process of being updated so if you cannot see it on there yet, it will be soon.
I started out by clear stamping and embossing the skull image. *yes this is a firm fave of mine at the moment!! Next, I stamped the birds using Snowcap Dabber and then clear embossed this too. I then dragged Pink Sherbert Dabber all over the tag, then used Raspberry to add accent colour and then wiped off the paint from the images. I used sandpaper to distress the edges of the tag and ran a gold Krylon around the edges to add a little extra dimension to the tag. Finally, I stamped the words using Alpha's from Stamps Away, added ribbons to the hole at the top and then tied a skull charm (which started out as silver and was transformed with my gold Krylon) on gold thread to the top of the tag.
I love this new product and it is really lovely to work onto as it has a nice smooth surface.
Thanks for looking
Hels x
Sunday 11 May 2008
SO SALSA - Stitches
Afternoon,
Christa from So Salsa Challenge has invited me to join in....well, I never need an excuse to do some stamping and getting inky too :O))
The theme for this week is "Stitches"
Here is my effort:
The main stamp is from Lost Coast Designs, although those "ladies" are somewhat dubious - I think they are actually men in drag :O))
The inks are Mustard Seed and Aged Mahogany on the edges and Dried Marigold and Dusty Concord in the middle. I waterbrushed their dresses to add a little glamour - well, they need a whole lot more help but it is a start!!
The stitch stamps are by HOTP (I think as they were a gift) and the words are made up from a cheapy alpha set my friend Dan got me in a dollar store.
Loving this challenge Christa, thanks for setting it!
Hels x
Sunday Stampers - Week 16 - Cool For Cats
Good Morning Stampers,
I hope you all enjoyed last week's theme and hasn't it been a quick week? It hardly seems like yesterday since I was humming Two Little Boys and now I am catterwauling along to Cool For Cats!!
Yes, it is time for a new challenge and this week (I bet you have already guessed this) the theme is Cats. :O)) It is a good job that there isn't a sound option on this blog otherwise you would all be able to hear me singing "oooooo eeeeeee oooooo" along to this Squeeze song LOL
Without further ado, here is my effort for this week!
I decided to make a tag for the challenge this week and began by using a plain cream tag which I got from here. These tags are so lush, smooth surface which is perfect for Distress Inks and just the right size at approx 3" x 6".
I inked up my latest favourite stamp from Lost Coast Designs (which I bought from here) and stamped it straight onto the tag. I then made a mask of the image and popped this over the one on the tag. Next, using Cut & Dry foam, I blended a selection of Distress Inks onto the tag. The colours I used were Scattered Straw, Spiced Marmalade, Dusty Concord and Aged Mahogany. I was trying to achieve the look of a Tequila Sunrise cocktail seeing as kitty is sitting in a cocktail glass. Not sure I got this look but I like the colours!!
Next, I lifted the mask off the kitty and painted him in, using a mixture of Dried Marigold and Walnut Stain Distress Inks and a waterbrush. I used Weathered Wood to just add a hint of colour to the glass, again using a waterbrush. I decided that the tag looked a bit bare so I used my second favest stamp, another from Lost Coast Designs, and inked up the chequered border with Dusty Concord and then Aged Mahogany and then before I stamped, I spritzed water onto it so I had a softer look. I popped the mask back over the kitty so the image wasn't spoiled & I stamped the chequer a few times and then used another fave stamp (can you see a theme here?) which is a Paper Bag Studios Spiral Bound image, stamping this in black StaZon and then highlighting with my Ranger White Pen.
Finally, I added little white stars to the kittens hat, 3D'd another hat onto the tag, added the words using alphabet stamps and edged the whole thing with black ink.
I hope that you all have loads of fun with this theme! You will have all probably guessed that I love cats and I loved making this tag so much I may have to make another :O))
Please remember to add a post here once you have made your entry, including a link to the place you are showing your work of art.
Thanks, Hels x
Saturday 10 May 2008
Holding Hands
Hello,
I have been asked by a colleague to make a card for friends of his who are celebrating an anniversary. I am not really very good at this type of card because I haven't got any stamps that have this greeting! So, I decided to use one of my favest stamps from PaperBag Studios. This is such a lovley stamp and the sentiment on it is so sweet too.
I firstly stamped the image in black StaZon onto cream cardstock. I then made a mask for the whole stamp and popped this over the original image. I then used Cut & Dry foam to blend Dusty Concord Distress Ink around the edges of the card. Next. I cut the mask down so it was just the hands and the flower and placed this over that part of the image. I used more Cut & Dry to blend Scattered Straw Distress Ink over the remaining part of the image.
To add a little colour to the coat sleeves, I used a waterbrush and painted on pink and then blue inks. I then added a dash of orange to the flower.
Matted onto silver satin card and then onto a piece of the Olde World stack from DCWV I then added this to the card.
The little message is from DoCrafts and was matted onto more of the DCWV paper.
Thanks for looking
Hels x
Tuesday 6 May 2008
Another Altered Canvas :O))
Hello,
I have done a little bit of crafting today...I am really suffering with my pain though so I haven't really got as much done as I would have liked. However, I did finally get another canvas altered, which I really loved making as I love the colours and subject I used :O))
I am taking part in a "canvas swap" on my Forum and I have altered this canvas for a certain person - and I know she likes pink and black and skulls....so what a brill excuse to use my new skull papers and even better....my dear friend Andrea has given me the Tim Holtz Anthology unmounted sheet! I am sooo over the moon because I love these stamps and I have been so wanting the skull stamp for so long....so I will say a HUGE thank you to Andrea, you are such a fabby friend and I am sooooo happy!! :O))
For this project I used an 8" x 8" canvas that was already primed with Gesso. I cut 12 mountboard squares 1 1/2" in size and one 3" square piece. I painted Worn Lipstick Cracklepaint onto four of the pieces and partly onto the larger square and then parts of the canvas itself and set these aside to dry. Then I covered the other pieces with sections of the patterned papers which are from Rusty Pickle and are in their new Princess Pirate range. I loooove these papers especially as they are all double sided so it feels like I get twice the value :O))
Once the papers were fixed to the mountboard squares, I set these aside to dry off as I used Glossy Accents as an adhesive. I find that this is the best glue to use on this type of project as DS tape can sometimes be affected by the temperature of the room that the canvas will be hanging in. Next I took the now dried canvas and blended Worn Lipstick and Black Soot Distress Inks onto it. I gave it a good covering and then let it dry off properly.
I used the skull stamp onto a couple of the papered squares and then added little embellishments to the other pieces of papered mountboard. I also used a bottlecap with a piece of the paper fixed into the centre of it and covered with Glossy Accents.
The centrepiece mountboard was then covered with Worn Lipstick Distress Ink and I then stamped the skull image in black StaZon. I then used Ultra Thick Embossing Powder over it to make it nice and glossy and whilst the embossing powder was still molted, I sprinkled silver powder over the edges.
Once the canvas was dry, I stamped the Flourish onto it, using black StaZon ink. I was ultra careful to make sure I got a good impression so I actually laid the stamp on its back and pressed the canvas onto it.
I assembled the pieces together and then stuck them to the canvas using Glossy Accents.
I hope that my "swapee" likes this canvas :O)) Who'd think that the first time I saw these "new" stamps I hated the skull and said I would never use it!! Now try and stop me!!
Thanks for looking!
Hels x